Project Brief
Mastering perfect cabinet hardware placement is the final, critical step to upgrading your kitchen without ruining your expensive doors. This data-driven guide eliminates the guesswork by providing exact center-to-center measurements, standard drop heights, and the foolproof template methods you need to confidently drill right the first time.
The High Cost of a Bad Drill Hole
Installing new cabinet and drawer pulls is one of the highest-ROI projects in home improvement. However, the cost of a mistake is massive. Drilling a hole just a quarter-inch off-center on a custom oak cabinet door instantly ruins a $150 piece of millwork. You do not need to hire a professional carpenter to get flawless results, but you absolutely must rely on standardized measurements rather than “eyeballing” it.
Our method focuses strictly on architectural standards and the mathematics of hardware placement on cabinets. By utilizing proper templates, understanding metric conversions, and following industry-standard drop heights, you eliminate human error. Perfecting your handles and pulls creates a symmetrical, high-end visual flow that makes budget kitchens look custom-built.
Whether you are updating an old vanity or installing brand new kitchen cabinets with pulls, understanding the exact tolerances of your materials ensures a permanent, beautiful finish.
The True Cost of Cabinet Hardware Installation
| Installation Method | Average Hardware Cost | Labor / Tool Cost | Risk / Hidden Costs |
|---|---|---|---|
| DIY (Eyeballing / No Math) | $100 – $300 | $0 (Free) | $150+ (Cost of replacing one misdrilled custom door) |
| DIY (Our Template Method) | $100 – $300 | $20 – $40 (Brad-point bit + Jig) | $0 (Measurements eliminate risk) |
| Hiring a Pro Carpenter | $100 – $300 | $300 – $500 ($75-$100/hr) | Scheduling delays, minimum call-out fees |
Project ROI & True Cost Calculator
Enter your project details below to see exactly how much you will save by using the template method instead of hiring a pro (or risking a ruined door).
The Materials & Science: Wood Structures and Metric Conversions
Before adding cabinet hardware to your kitchen, you must understand the physical structure of your doors and the manufacturing standards of the pulls themselves.
Standard Cabinet Door Thickness vs. Required Screw Length
| Cabinet Component | Average Wood Thickness | Required Screw Length (Truss Head) |
|---|---|---|
| Standard Cabinet Door | 3/4 inch | 1 inch (or 1 1/8 inch) |
| Thick Custom Door | 1 inch | 1 1/4 inch |
| Drawer Face (Attached to Drawer Box) | 1 1/2 inches (3/4″ face + 3/4″ box) | 1 3/4 inch |
| Shaker Stile (Standard) | 3/4 inch | 1 inch |
The standard thickness for most modern kitchen cabinet doors is 3/4-inch. To secure a standard knob or pull to a 3/4-inch door, you will typically need a 1-inch or 1 1/4-inch machine screw.
However, drawer fronts are thicker because you are drilling through both the decorative drawer face and the structural drawer box behind it. For standard drawers, which total around 1 1/2 inches thick, you will need 1 3/4-inch screws. Always verify your thickness before buying hardware.
The Stile and Rail Rule
Traditional cabinet faces (like standard Shakers) are built using a five-piece construction: two vertical stiles, two horizontal rails, and a center panel.
The golden rule of cabinet drilling is that hardware must only be mounted to the solid stiles or solid rails. You must never drill into the recessed center panel, as this panel is designed to “float” and expand or contract with the humidity in your kitchen.
The “Metric Gotcha” (Imperial vs. Metric Sizing)
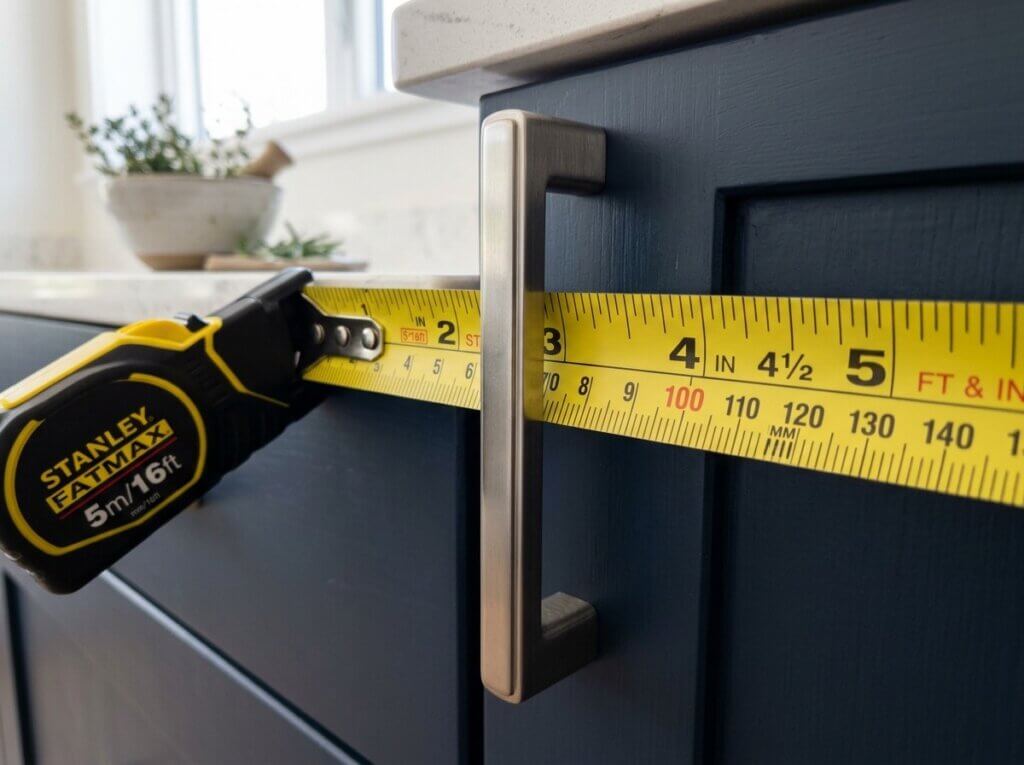
Almost all modern cabinet hardware is manufactured using metric measurements, but it is frequently marketed to North American consumers using imperial approximations. For example, a standard cabinet pull might be sold as “3 3/4 inches,” but its true machined center-to-center measurement is exactly 96mm. When setting your templates or measuring drill marks, always convert to and measure in millimeters to guarantee perfect alignment with the machined threads.
The biggest mistake DIYers make when buying a new cabinet pull is failing to understand the global manufacturing standard. While North American cabinets and tape measures are marked in inches, nearly all hardware is manufactured overseas using the metric system.
If you go to a hardware store and measure a handle with a standard tape measure, it might look like exactly 3.75 inches. But if you drill your holes at exactly 3.75 inches, the rigid steel threads might bind against the wood. Why? Because the actual mm measurement is 96mm (which is technically 3.779 inches).
To guarantee your drill holes align perfectly with the machined threads of the hardware, you must calculate the exact conversion center. The mechanical formula is strictly: Inches × 25.4 = Millimeters.
Use our quick conversion calculator below to find the exact metric size for your hardware spacing:
Hardware Conversion Calculator
Enter your center-to-center measurement in inches to find the exact millimeter (mm) requirement for your hardware.
True Metric Size:
0 mm
If you prefer a quick reference instead of the calculator, here is a chart for the most common center-to-center sizes to help you convert from 3 inches to mm and beyond:
| Standard US Label | True Metric Size (mm measurement) | Exact Decimal Equivalent |
|---|---|---|
| 3 inches | 76 mm | 2.992 inches |
| 3.5 inches | 89 mm | 3.503 inches |
| 3.75 inches | 96 mm | 3.779 inches |
| 4 inches | 102 mm | 4.015 inches |
| 5 inches | 128 mm | 5.039 inches |
| 6.25 inches | 160 mm | 6.299 inches |
Data aligned with international hardware manufacturing specifications. To see how this project fits into your full room remodel, check out our master guide on budget kitchen renovations.
Essential Tools
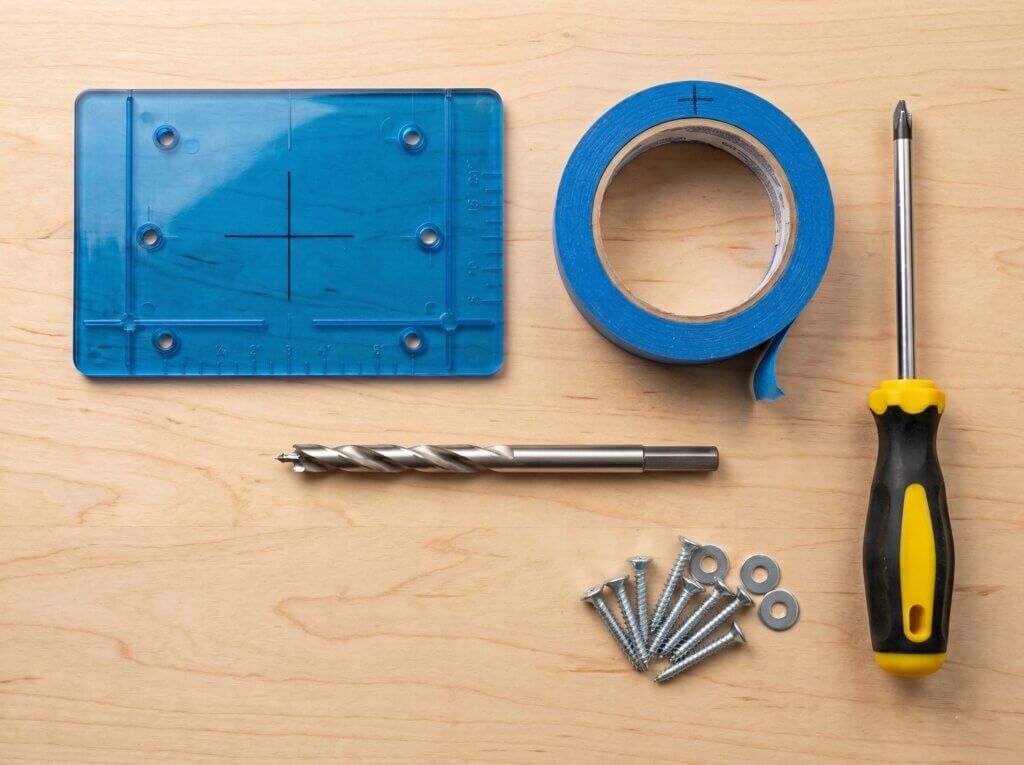
To achieve perfect cabinet knob placement and avoid wood tear-out, you need specific tools engineered for cabinetry.
- Cabinet Hardware Template: A rigid plastic or aluminum guide that hooks over the edge of the door, ensuring every hole is marked at the exact same height and distance. A template for cabinet handles is non-negotiable for professional results.
- 3/16-inch Brad-Point Drill Bit: Standard twist bits wander on hard wood grains like maple or oak. A brad-point bit has a sharp center spike that bites into the wood instantly, guaranteeing your hole stays exactly on your mark.
- Masking Tape: Used to wrap the drill bit as a depth stop, preventing you from pushing the drill chuck into the face of the cabinet and ruining the paint.
- Manual Phillips Screwdriver: Never use a power drill or impact driver for cabinet handle installation. The torque will instantly strip the delicate machined threads inside the pulls or crush the soft wood fibers on the back of the door.
Cabinet Hardware Jig Comparison Guide
| Tool Type | Best Used For | Accuracy Level | Estimated Cost |
|---|---|---|---|
| Basic Plastic Template | Small projects, standard knobs, budget DIY | Moderate (can flex if pressed hard) | $5 – $10 |
| Multi-Axis Aluminum Jig | Full kitchen remodels, wide metric pulls | High (rigid metal, micro-adjustments) | $30 – $50 |
| Kreg Hardware Jig | Beginners needing clamping support | High (built-in edge guides) | $25 – $40 |
Drill Bit Selection for Cabinetry
Standard twist bits wander on hard wood grains like maple or oak. You must use a brad-point bit, which has a sharp center spike that bites into the wood instantly, guaranteeing your hole stays exactly on your mark.
| Drill Bit Type | Wood Engagement | Verdict for Cabinetry |
|---|---|---|
| Brad-Point Bit (3/16″) | Pinpoint sharp center spike prevents wandering; clean exit hole. | ✅ Required |
| Standard Twist Bit | Skates across slick paint/varnish; causes tear-out on the back of the door. | ❌ Avoid |
| Spade Bit | Uncontrollable tear-out; destroys soft interior wood fibers. | ❌ Never Use |
The Golden Rules of Cabinet Hardware Placement
The National Kitchen & Bath Association (NKBA) provides established ergonomic guidelines for correct cabinet hardware placement. Following these rules ensures your kitchen door pulls look proportional and function beautifully without causing wrist strain.
Standard Height for Kitchen Cabinet Knobs and Pulls
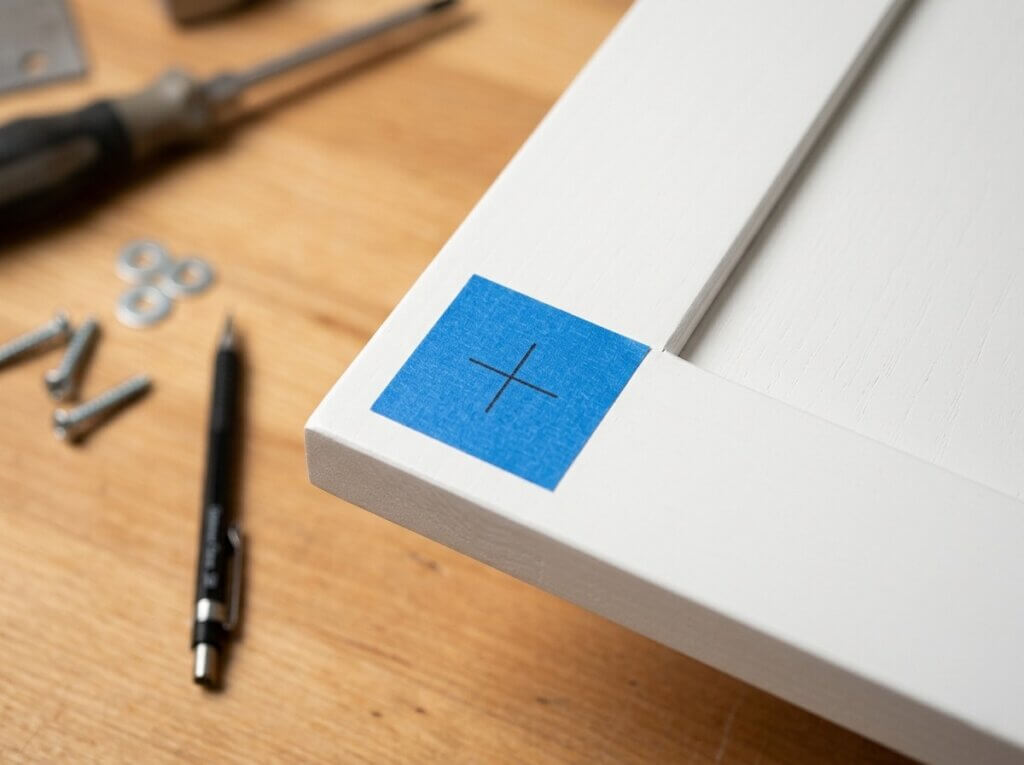
Consistency is the most important aspect of hardware installation. For upper wall cabinets, the standard placement is to center the knob or the bottom hole of the pull exactly 2 1/2 to 3 inches up from the bottom corner of the door. For lower base cabinets, mirror this measurement by placing the hardware 2 1/2 to 3 inches down from the top corner of the door.
Quick Reference Placement Guide
| Cabinet Type | Hardware Type | Standard Placement Rule |
|---|---|---|
| Upper Wall Cabinets | Knobs | 2.5″ to 3″ up from bottom corner, centered on stile. |
| Upper Wall Cabinets | Long Door Handle | Bottom hole 2.5″ to 3″ up from corner. |
| Lower Base Doors | Knobs | 2.5″ to 3″ down from top corner, centered on stile. |
| Lower Base Doors | Pulls | Top hole 2.5″ to 3″ down from top corner. |
| Standard Drawers | Pulls | Dead center (vertically and horizontally). |
Understanding these basic dimensions guarantees perfect kitchen cupboard knob placement every single time.
Shaker Cabinet Hardware Placement
Shaker cabinets feature a distinct recessed center panel, which dictates specific rules for hardware placement on shaker cabinets to maintain their clean, geometric lines.
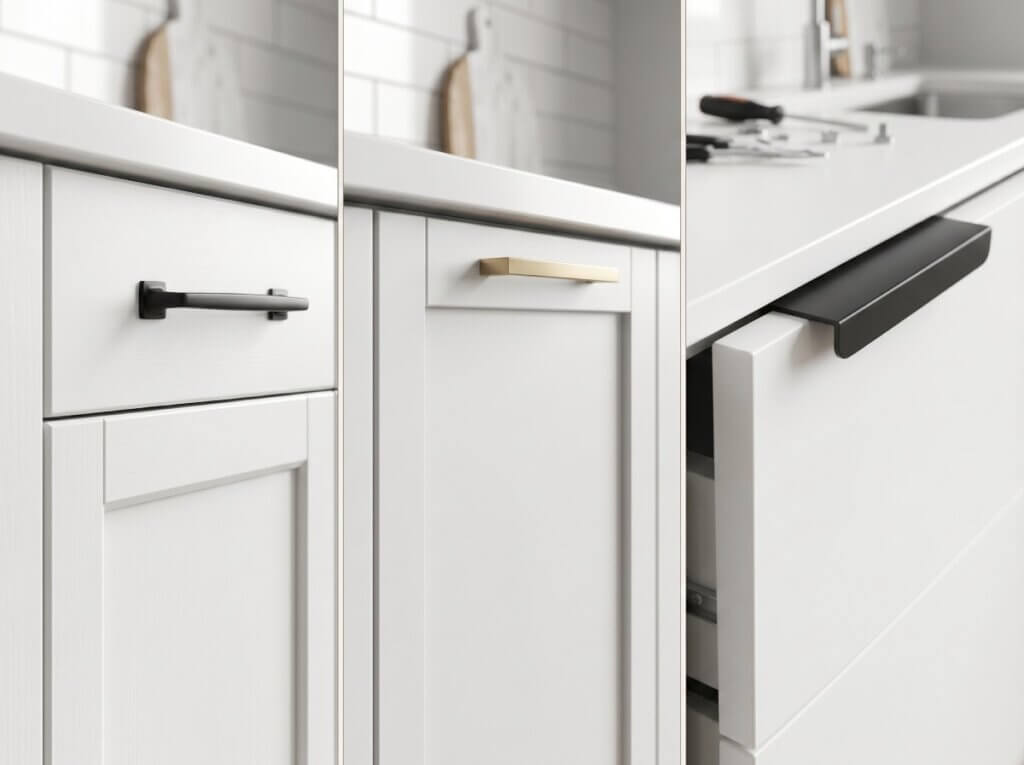
Where to Place Handles on Shaker Cabinets
Standard Shaker cabinets have wide, solid vertical stiles (usually 2 to 3 inches wide). Your knobs or vertical pulls should be perfectly centered horizontally on this vertical stile, and placed 2.5 to 3 inches from the top or bottom edge.
Where to Place Handles on Slim Shaker Cabinets
Slim Shakers feature an ultra-thin frame (often only 1/2-inch to 3/4-inch wide), making it impossible to mount standard hardware on the vertical stile. For Slim Shakers, hardware is typically top-mounted horizontally on the top rail, or placed entirely within the flat center panel, breaking the traditional “Stile and Rail” rule out of necessity.
Where to Place Edge Pulls and Profile Handles
Edge pulls (or profile pulls) are minimalist metal tabs that do not mount to the face of the cabinet at all. Instead, they are screwed into the very top edge of a base door/drawer or the bottom edge of an upper door. They should sit completely flush against the wood, wrapping around the back of the cabinet door so only the front lip is visible. Always center edge pulls on the width of the door or drawer.
- For Base Cabinets: Mount the pulls on the top edge of the door.
- For Upper Cabinets: Mount the pulls on the bottom edge of the door.
- For Drawers: Mount dead center on the top edge of the drawer box.
The Math: Measurements and Centering
The key to flawless execution is knowing how to measure cabinet pulls properly and doing the math correctly for wide, heavy drawers.
The 1/3 Proportional Rule for Drawer Pull Sizing
| Drawer Width | Recommended Hardware Setup | Ideal Hardware Size |
|---|---|---|
| Under 12 inches | 1 Knob or 1 Small Pull | Knob or 3-inch (76mm) Pull |
| 12 to 24 inches | 1 Medium/Large Pull | Length should be approx. 1/3 of drawer width |
| 24 to 36 inches | 2 Pulls (or 1 Extra-Long Pull) | Two 4-inch pulls, or One 12-inch pull |
| 36+ inches | 2 Large Pulls | Two 6-inch pulls (divided by thirds) |
How to Measure Center to Center Cabinet Pulls
If you are wondering how do you measure for drawer pulls, the rule is simple: do not measure the hardware from end to end. You must measure from the dead-center of one screw hole to the dead-center of the other. This center-to-center spread is the only measurement that matters when buying replacement parts, whether you are installing sleek modern hardware or vintage brass desk handles.
Pro Tip: If you are having trouble determining the exact distance of an existing piece of hardware, take your old pull to a supplier like Top Knobs or your local hardware store and physically drop it onto the display pegs to check the sizing.
Math for Centering Drawer Pulls
Nailing your cabinet drawer pull placement requires two simple equations to find the exact center of the drawer face.
- Find the Drawer Center: Measure the total width of the drawer face and divide by two. Draw a light vertical line on a piece of masking tape. Measure the total height of the drawer face and divide by two. Draw a horizontal intersecting line. The exact crosshair is your dead center.
- Mark the Holes: Take your hardware’s center-to-center measurement (for example, 3.75 inches). Divide that number by two (1.875 inches). Measure 1.875 inches to the left of your center mark and make a hole. Measure 1.875 inches to the right of your center mark and make a hole.
Skip the fractional math entirely. Use our Centering Calculator below to find exactly where to place your drill holes:
Drawer Centering Calculator
Enter your drawer width and hardware size. We will tell you exactly how far to measure from each edge to perfectly center your pull.
Measure this distance from the left edge AND the right edge:
0″ from edges
The “Two-Pull” Rule for Wide Drawers
Figuring out where to install cabinet pulls on drawers wider than 24 inches (common for deep pot-and-pan storage) requires a different approach. A single pull in the center will cause the metal drawer slides to bind and warp over time due to uneven pulling pressure. For drawers 24 inches or wider, you must install two separate drawer handles and pulls. To calculate this drawer hardware placement, divide the total width of the drawer into thirds and place one handle exactly at the 1/3 mark and the other at the 2/3 mark.
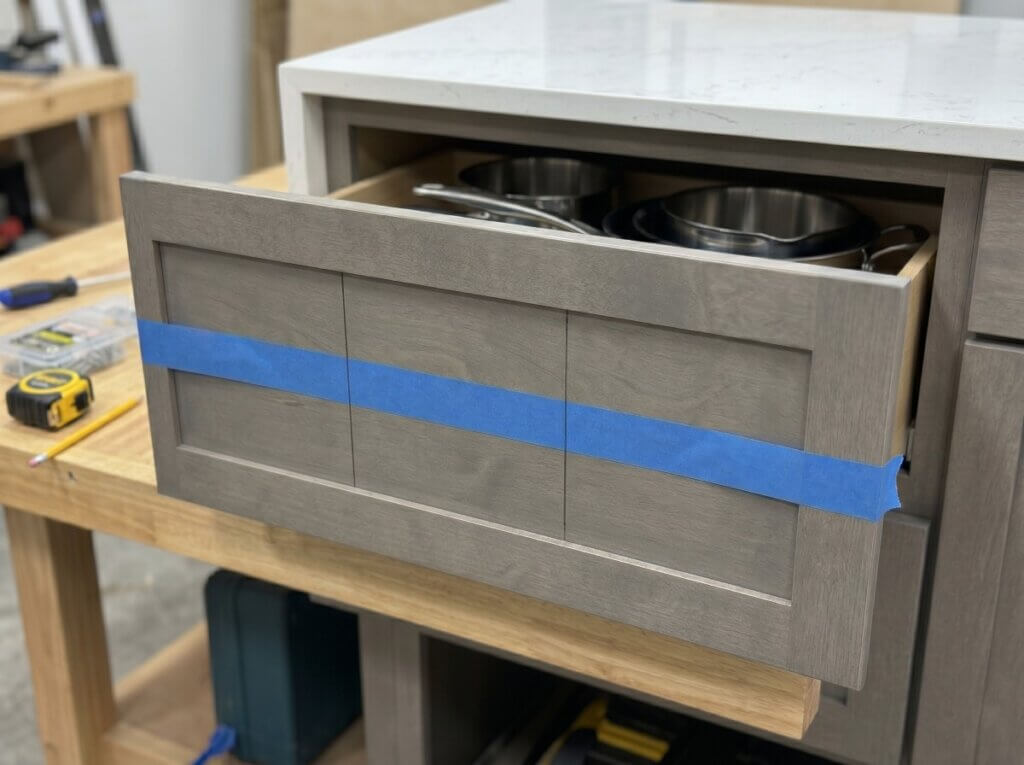
Step-by-Step Execution: Installing Your New Hardware
Once you have your math locked in and your spacing verified, it is time to drill. Follow these exact mechanical steps for perfect, blowout-free holes.
1. Transitioning from Cabinet Knobs to Pulls (Optional Repair)
If you are updating an older kitchen and altering your cabinet pulls and knobs placement (moving from single-hole knobs to two-hole pulls), you must patch the original holes first. Use a high-quality two-part epoxy wood filler (not standard drywall spackle) to fill the old holes. Sand it perfectly flush before priming and painting. If you drill new holes without patching the old ones, the structural integrity of the stile is permanently compromised.
2. Set Your Cabinet Hardware Template
A standard cabinet pulls template is a plastic square with a sliding guide and a grid of pre-drilled pilot holes.
- Hold the cabinet hardware template against the corner of your door.
- Adjust the sliding edge guide so the indicator aligns with the exact center of your stile.
- Choose the hole that corresponds to your 2.5″ or 3″ drop height.
- Use a sharp pencil to mark the hole locations through the plastic cabinet door knob template.
Pro Tip: For complex, highly custom jobs, you can reference the micro-adjustments provided by premium jig manufacturers like Kreg Tool, which offer multi-axis hardware guides.
3. Prep the Wood with Masking Tape
Place a square of blue painter’s tape directly over your pencil marks. The tape serves two critical purposes: it gives your drill bit a textured surface to bite into so it doesn’t skate across slippery cabinet finishes, and it helps compress the wood fibers to prevent chipping when the bit enters the wood.
4. Drill with a Brad-Point Bit
Chuck a 3/16-inch brad-point bit into your power drill. Place the sharp center point of the bit directly onto your pencil mark. Hold the drill perfectly level (90 degrees to the cabinet face). Apply firm, steady pressure and drill completely through the door.
Depth Stop Hack: Wrap a piece of masking tape around your drill bit exactly 1 inch from the tip. Stop drilling the second the tape touches the cabinet door to prevent your heavy drill chuck from scratching the paint.
5. Mount the Hardware by Hand
When mounting cabinet pulls, push the provided machine screws through the back of the cabinet door. Hold your new drawer pulls against the front face. Use a manual screwdriver to tighten the screws from the back.
Stop tightening the exact moment the hardware is flush and snug against the front wood. Do not over-tighten, or you will pull the metal screw head completely through the soft interior wood of the cabinet door and ruin the finish.
FAQ
Q. Where should knobs be placed on upper kitchen cabinets?
A. The standard rule is to place the center of the knob exactly 2.5 to 3 inches up from the bottom corner of the cabinet door. The hardware should always be centered horizontally on the solid vertical frame (the stile).
Q. What is the true metric size for a 3.75-inch cabinet pull?
A. A standard 3.75-inch cabinet pull is manufactured to an exact metric measurement of 96mm. You must use 96mm as your true center-to-center measurement to ensure the drill holes align perfectly with the machined threads.
Q. Where do you mount hardware on Shaker cabinet doors?
A. Cabinet hardware should always be mounted directly onto the solid vertical frame (the stile) of the Shaker door. You must never drill into the thin, recessed center panel, as it is designed to float and expand with humidity.
Q. How wide should a drawer be before it needs two pulls?
A. If a drawer is 24 inches or wider, you must install two separate pulls to prevent the internal metal drawer slides from binding over time. To place them correctly, divide the total drawer width into thirds and install the hardware exactly at the 1/3 and 2/3 marks.
Q. What kind of drill bit is best for installing cabinet hardware?
A. You should use a 3/16-inch brad-point drill bit. Unlike standard twist bits that skate across slick cabinet paint, a brad-point bit features a sharp center spike that bites into the wood instantly, guaranteeing your hole stays exactly on your pencil mark.
Ready to complete your kitchen makeover? Check out our master guide on How to Update DIY Kitchen Cabinets (Without Replacing Them). We break down the exact chemical deglossers, urethane alkyd paints, and budget-friendly refacing techniques you need to give your existing doors a durable, factory-grade finish for under $300.
Safety Disclaimer: DIY projects involve the use of chemicals, power tools, and materials that can cause injury. Always wear proper PPE (Personal Protective Equipment), read manufacturer safety manuals, and ensure proper ventilation.

The Harvest Home Life Team is a collective of hands-on researchers and material evaluators dedicated to data-driven home improvement. Operating out of our active testing workshop, we deliver field-tested blueprints, rigorous tool diagnostics, and precise cut-lists. From calculating shear strength for load-bearing mounts to diagnosing structural deficiencies, we provide the objective data required to execute professional-grade DIY projects safely and effectively.