Project Brief
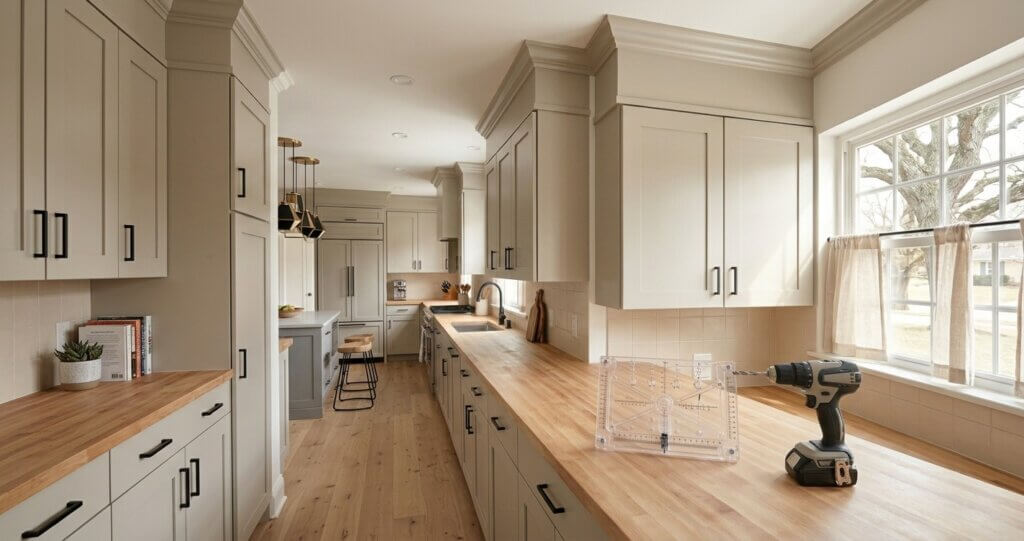
**Transforming your diy kitchen cabinets doesn’t require a demolition crew or a massive budget.** By focusing purely on surface-level upgrades like factory-finish coatings, structural trim, and modern hardware, you can modernize your space. Welcome to the ultimate directory for upgrading your builder-grade cabinets into custom millwork.
The “Surface-and-Finish” Workshop Philosophy
The most expensive mistake homeowners make is assuming that outdated doors mean the entire wooden box is useless. Standard builder-grade cabinet boxes are usually structurally sound. By keeping the footprint exactly where it is, you bypass the need to reroute plumbing, move gas lines, or patch drywall.
Our approach relies on exact material tolerances, chemical bonding, and precision millwork.
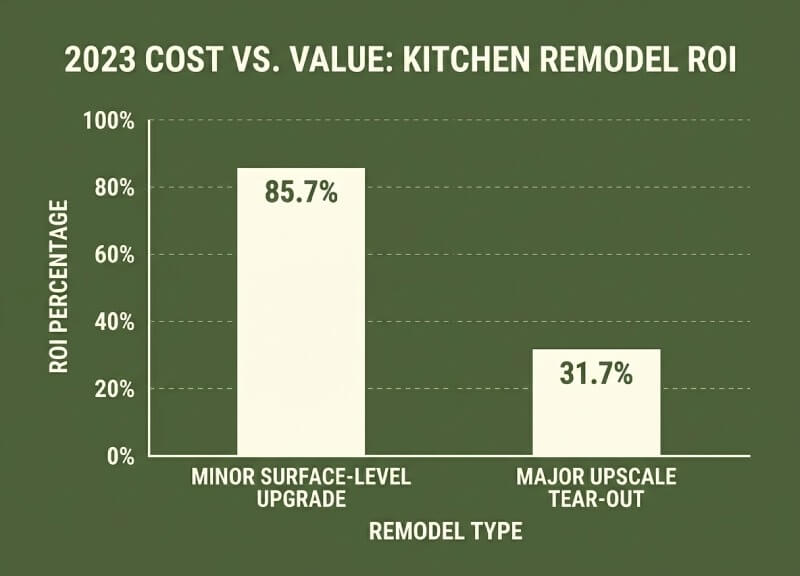
According to the Remodeling Magazine Cost vs. Value Report, minor, surface-level kitchen upgrades yield a significantly higher return on investment than massive upscale tear-outs.
We bypass the inflated markup of custom cabinetry by applying a strict “surface-and-finish” methodology to your existing setup.
Coatings & Refacing
Factory-Finish Paint and Veneers
Painting your diy kitchen cupboards involves intense chemistry, not just brushing on a new color. Traditional interior latex paints are designed for drywall; they remain pliable and rubbery, meaning they will easily peel and chip when applied to a high-traffic cabinet door.
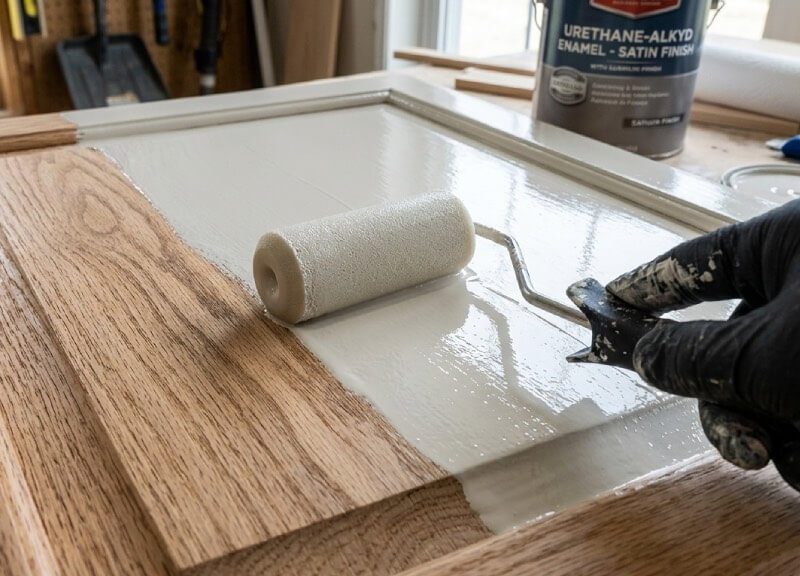
To achieve an indestructible, factory-like shell, we utilize Urethane Alkyd Enamels. This hybrid coating suspends heavy-duty oil resins in water. As the water evaporates, it leaves behind a self-leveling, impact-resistant finish.
Paired with a liquid chemical deglosser, this completely eliminates the need to sand your cabinet doors down to bare wood.
| Coating Chemistry | Durability Rating | Cure Time to Max Hardness | Leveling Capability |
|---|---|---|---|
| Standard Acrylic Latex | Low (Chips easily) | 14 Days | Poor (Shows brush strokes) |
| Traditional Oil (Alkyd) | High (Prone to yellowing) | 30 Days | Excellent |
| Urethane Alkyd Enamel | Extreme (Impact resistant) | 21-30 Days | Superior (Self-leveling) |
To seamlessly connect these chemistry concepts to your specific project, we have developed detailed protocols depending on your starting material. If you want to preserve the wood look rather than covering it, understanding the chemical differences between gel stain versus chemical paint for oak DIY cabinets is crucial for preventing a tacky, uncured finish.
Alternatively, if you are dealing with mismatched materials, our deep dive on applying real wood veneer to MDF cabinet ends will show you how to make flat, builder-grade boxes look like solid hardwood.
Finally, for those ready to graduate from foam rollers, we break down the exact viscosity thinning ratios needed for setting up an HVLP sprayer to achieve a flawless, brush-free shell.
If your cabinet boxes are structurally sound, a high-end paint job is the most cost-effective way to completely transform your kitchen. Skip the dusty orbital sanders and learn how to apply a flawless, impact-resistant hybrid enamel in our complete tutorial: How to Paint Kitchen Cabinets: A Beginner to Pro Guide (No Sanding).
Hinges & Door Mechanics
Upgrading Cabinet Articulation
A kitchen does not feel luxurious if the doors slam shut or hang crookedly. Much of the perceived value of high-end cabinetry comes down to the articulation—how the door moves and rests against the face frame.
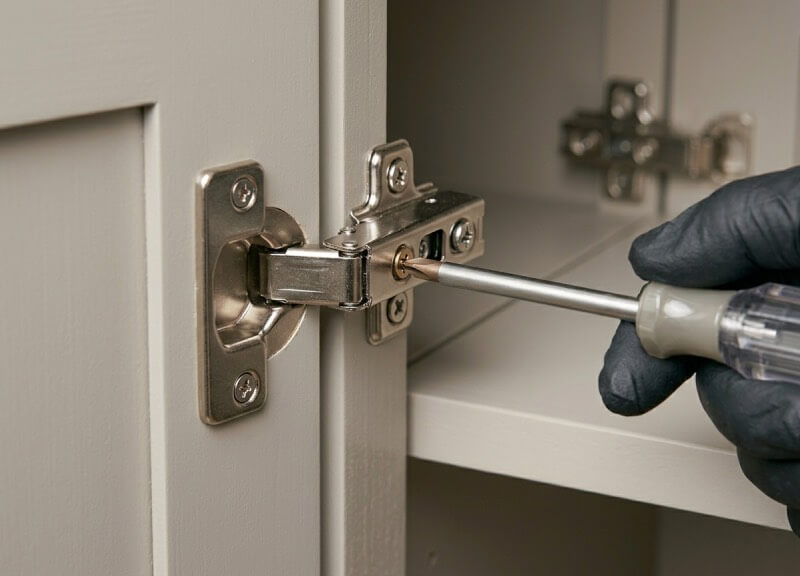
Upgrading your diy cabinets from exposed, 1990s brass hinges to concealed European soft-close hinges completely changes the tactile experience of the room. This requires understanding overlay measurements (e.g., 1/2-inch vs. 1 1/4-inch overlays) and using specialized Forstner bits with hinge jigs to drill out the exact 35mm cup holes required for modern mechanical hinges.
We cover this entire transition process in our guide to retrofitting soft-close hidden hinges on old cabinets, detailing exactly how to measure door overlays so your new hardware clears the existing face frame. If you decide to keep the vintage look, it is vital to weigh the mechanical pros and cons of exposed versus hidden hinges for modern kitchen aesthetics.
Even if you aren’t replacing the hardware entirely, mastering the mechanics of your existing setup is a game-changer; simply learning how to adjust 6-way European hinges can instantly fix sagging doors and eliminate uneven gaps without spending a single dollar.
Don’t skip the mechanics! Pristine, newly painted cabinet doors still feel cheap if they slam shut. Protect your fresh paint job from chipping and give your kitchen a luxury, silent finish by following our step-by-step guide to [DIY Soft-Close Cabinet Hinges: How to Measure, Install, and Adjust].
Internal Storage & Drawers
Heavy-Duty Drawer Construction
When you look at making cabinets functional, the interior mechanics matter just as much as the exterior paint. Standard builder-grade drawer boxes are often constructed from stapled particleboard riding on cheap epoxy slides. Over time, the weight of cast iron pans and ceramic dishes causes the bottoms to sag and the tracks to derail.
We focus heavily on the mechanical side of building cabinets from the inside out. Upgrading your storage involves removing those weak boxes and assembling heavy-duty, 5/8-inch Baltic birch plywood drawer boxes using pocket-hole joinery. We pair these custom boxes with cold-rolled steel, full-extension undermount slides.
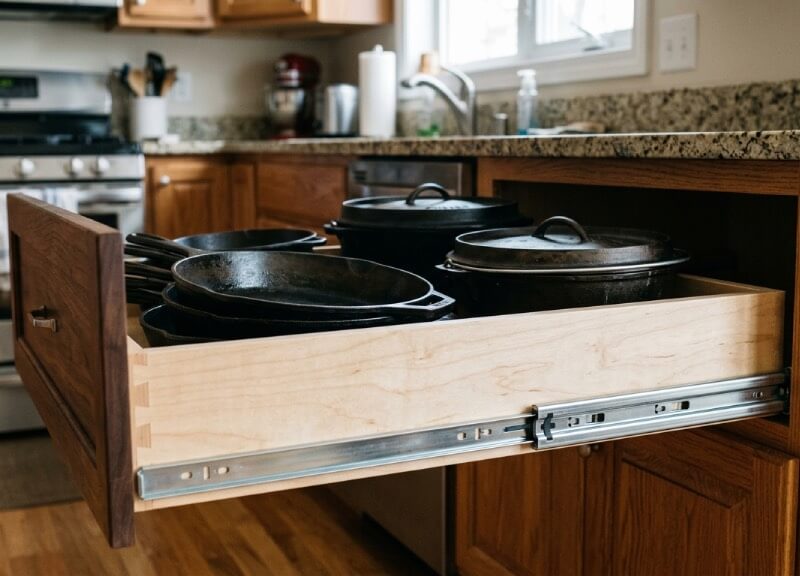
| Drawer Slide Type | Extension Capacity | Weight Rating | Best Application |
|---|---|---|---|
| Side-Mount Epoxy | 3/4 Extension | 50 lbs | Lightweight silverware, junk drawers |
| Side-Mount Ball Bearing | Full Extension | 100 lbs | General utility, medium pots |
| Undermount Soft-Close | Full Extension | 100 – 150+ lbs | Heavy cast iron, deep pantry pull-outs |
Upgrading the slide mechanism is only half the battle; the wooden box itself must be perfectly square. In our comprehensive breakdown on how to build and install custom plywood kitchen drawer boxes, we cover the exact corner clamping jigs and pocket-hole placements needed to ensure your drawers never bind on the heavy-duty tracks.
Once you master this foundational woodworking skill, you can apply the exact same mechanics to custom utility upgrades.
This includes building DIY pull-out trash can conversions to hide unsightly bins, or constructing deep slide-out pantry shelves that maximize the dead space in the back of your deep base cabinets.
Fresh paint makes your kitchen look brand new, but custom storage makes it feel high-end. Stop digging around on your hands and knees in dark lower cabinets! Take your newly updated kitchen to the next level by learning how to build [Custom DIY Drawer Boxes with Undermount Slides]. It is the ultimate weekend project to maximize your storage space.
Hardware & Drilling Jigs
Precision Handle Placement
Installing cabinet pulls is the “jewelry” of the kitchen remodel, but it is also where the most catastrophic mistakes occur. Drilling a hole a quarter-inch off-center into a freshly painted, fully cured cabinet door ruins the entire aesthetic.
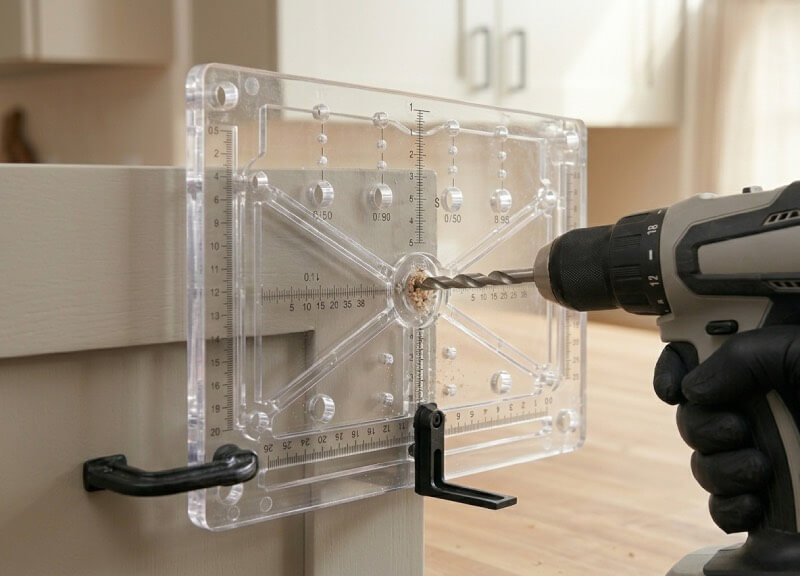
Proper handle placement relies strictly on geometry, not eyeballing. Utilizing a polycarbonate cabinet hardware jig ensures millimeter precision across every single door and drawer face in the room. We establish a mathematical baseline for standard rail and stile placement, ensuring your hardware aligns perfectly with the structural frame of the cabinetry.
Standard Hardware Placement
| Hardware Type | Cabinet Door Style | Standard Placement Rule (Center Mark) |
|---|---|---|
| Knobs (Upper Cabinets) | Flat / Slab | 2″ to 2.5″ up from the bottom corner. |
| Pulls (Upper Cabinets) | Shaker Style | Centered on the vertical stile, bottom hole aligned with the top edge of the bottom rail. |
| Pulls (Base Drawers) | Shaker Style | Dead center of the recessed middle panel. |
| Pulls (Tall Pantry Doors) | Any | Centered vertically, or roughly 36″ to 40″ from the floor to match standard counter height. |
If you are upgrading from 1990s knobs to modern pulls, you cannot simply drill new holes. You must first master how to chemically fill and disguise old handle holes before repainting, using two-part epoxy wood filler rather than standard wall spackle to prevent the paint from sinking over time.
Once the surface is prepped, our ultimate kitchen cabinet hardware placement math guide provides the exact fractional measurements for centering pulls on shaker stiles versus flat slab doors.
For those seeking a sleeker look, we also explore the best minimalist finger pulls for modern kitchen upgrades, which mount to the top edge of the drawer and completely eliminate the need to drill through the front face.
Before you pick up your power drill, read our definitive guide on Perfect Cabinet Hardware Placement Every Time. We show you the exact mathematical formulas for centering wide drawer pulls, the imperial-to-metric conversion traps to watch out for, and how to use a basic template so you never suffer a wood-splintering blowout.
Millwork & Trim Upgrades
Closing Gaps and Customizing Ends
The defining architectural feature of cheap cabinetry is the awkward, useless 12-inch gap between the top of the upper cabinets and the ceiling. High-end, custom millwork extends seamlessly from the floor to the ceiling. Achieving this look does not require buying new, taller cabinets.
By building a structural 2×2 lumber frame above your existing boxes and cladding it in medium-density fiberboard (MDF), you can bridge that empty space. Wrapping the junction with an angled crown molding creates the illusion of tall, bespoke cabinetry.
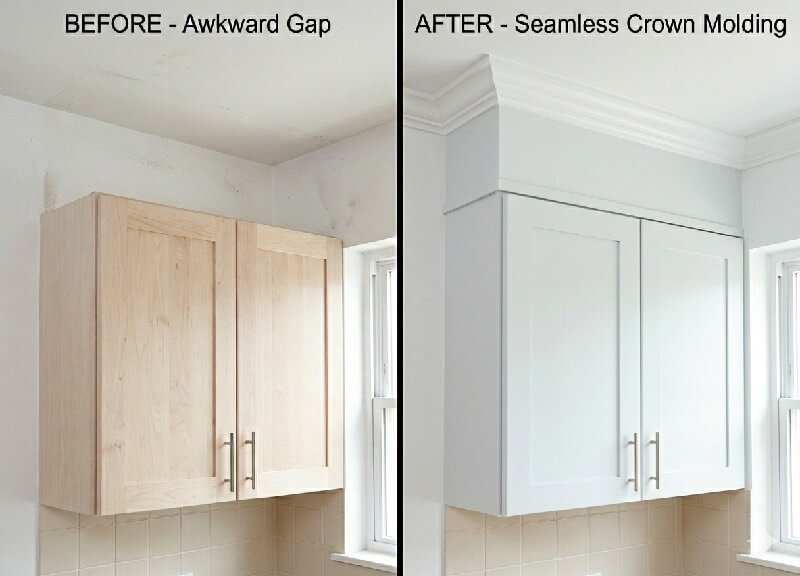
When altering the physical footprint of islands or peninsulas with trim, we always cross-reference the National Kitchen & Bath Association (NKBA) Planning Guidelines to maintain a strict minimum of 36 inches for functional walkway clearances.
Beyond the ceiling, you can dramatically alter the perceived quality of your cabinets by modifying the exposed sides. Standard builder-grade cabinets often feature cheap, printed wood-grain paper on the exposed ends. By adding custom MDF end panels to hide builder-grade seams, you create a flush, furniture-like finish.
This architectural approach extends to the lower base cabinets as well; wrapping a kitchen peninsula island in beadboard trim completely disguises the fact that it is made of three separate, cheap base boxes bolted together. By learning how to scribe these rigid trim pieces to perfectly match unlevel floors and ceilings, you force the eye to see a singular, high-end installation.
Essential Tools for Cabinet Upgrades
You rarely need industrial, commercial-grade equipment to execute these surface-level upgrades. Success comes down to precision tools that guarantee accurate measurements and controlled finishes.
When utilizing atomized sprayers for Urethane Alkyd paints, always ensure aggressive cross-ventilation, as the EPA notes that indoor volatile organic compounds (VOCs) can spike significantly during application.

| Tool Category | Specific Equipment | Primary Function in Cabinet Upgrades |
|---|---|---|
| Measurement & Alignment | Self-Leveling Cross-Line Laser | Ensuring hardware and trim are perfectly horizontal |
| Finishing Application | HVLP Fine-Finish Sprayer | Achieving a factory-smooth, brush-free paint shell |
| Joinery & Assembly | Pocket-Hole Jig System | Building structurally rigid, heavy-duty drawer boxes |
| Architectural Millwork | 18-Gauge Pneumatic Brad Nailer | Attaching delicate crown molding without splitting MDF |
| Safety & PPE | Half-Face Organic Vapor Respirator | Filtering dangerous airborne VOCs during chemical painting |
Pro-Tip: Do not waste your budget on a massive sliding compound miter saw if you are only cutting 3-inch crown molding. A standard 10-inch miter saw equipped with a high-tooth-count (80T+) carbide blade will provide cleaner, sharper cuts with significantly less tear-out.
How to Update Your Kitchen Cabinets (The Workshop Method)
If you want to achieve that massive 85.7% ROI on your kitchen upgrade without the headache of demolition, you need to approach this as a surface and mechanics workshop. Here is the high-level roadmap to modernizing your cabinets—you can click through to our dedicated guides for the exact step-by-step details on each phase.
Step 1: Surface Prep and Factory-Finish Coatings You do not need to mechanically sand your cabinets down to bare wood. The modern approach relies on liquid chemical deglossers and extreme-bond primers to safely etch the existing clear coat. Finishing the doors with a Urethane Alkyd Enamel (ideally applied with an HVLP sprayer) creates a perfectly smooth, moisture-repellent shell that completely hides deep oak grain. Read our full guide on Factory-Finish Paint and Veneers here.
Step 2: Upgrading Internal Storage & Drawers A modern kitchen isn’t just about looks; it is about smooth mechanics. You cannot attach heavy-duty, 100-lb full-extension undermount slides to cheap, stapled particleboard. You will need to assemble new 5/8-inch Baltic birch plywood drawer boxes using sturdy pocket-hole joinery. Read our full guide on Heavy-Duty Drawer Construction here.
Step 3: Architectural Millwork & Trim Upgrades To make basic cabinets look custom, you need to focus on closing ceiling gaps and customizing the exposed cabinet ends. Using dimensionally stable MDF and an 18-gauge pneumatic brad nailer allows you to attach delicate crown molding safely without splitting the material. Just remember to measure your newly expanded footprint against NKBA guidelines to maintain a strict minimum 36-inch walkway clearance.Read our full guide on Millwork & Trim Upgrades here.
Step 4: Precision Hardware Placement The final step is swapping out the hinges and pulls. Instead of measuring every door by hand, using a specialized hardware and drilling jig alongside a self-leveling cross-line laser ensures perfect horizontal alignment across every single cabinet face. Read our full guide on Hardware & Precision Drilling Jigs here.
FAQ
Q. Is it actually cheaper to modify my existing cabinet boxes rather than buying custom replacements?
A. Yes. By preserving the structural cabinet boxes, you completely bypass the need for demolition, plumbing rerouting, and drywall repair. As noted in national cost versus value data, focusing strictly on surface-level finishes and mechanical upgrades yields an 85.7% ROI, completely outperforming the 31.7% ROI of a massive upscale tear-out.
Q. Will adding MDF trim and painted finishes hold up to the heat and moisture of a high-traffic kitchen?
A. It depends entirely on your chemistry and material selection. MDF is structurally stable and resists the humidity-induced warping that plagues solid wood, making it ideal for ceiling gap framing. When that trim and the existing doors are coated in a Urethane Alkyd Enamel rather than standard acrylic latex, the finish chemically cures over 30 days into an impact-resistant, moisture-repellent shell.
Q. Can I install heavy-duty, soft-close drawer slides in cheap, standard builder-grade cabinet frames?
A. Yes, but you cannot attach them to the existing stapled particleboard drawers. To utilize 100-lb full-extension undermount slides, you must assemble new 5/8-inch Baltic birch plywood drawer boxes using pocket-hole joinery. The cabinet frame itself is strong enough to hold the hardware, provided you calculate the exact side-to-side internal clearances required for the new steel tracks.
Q. Do I need to mechanically sand my heavily grained oak cabinets down to bare wood before updating the surface?
A.No. The modern workshop approach utilizes liquid chemical deglossers and extreme-bond primers instead of heavy mechanical sanding. A chemical deglosser safely etches the existing clear coat, creating microscopic abrasions. When paired with a self-leveling hybrid enamel, this chemical bond creates a perfectly smooth finish that completely hides the deep wood grain.
Q. If I add architectural millwork and trim to my kitchen island, will it cause layout or code issues?
A. It can if you do not measure your walkways. Building out a peninsula with 2×2 framing and beadboard alters the physical footprint of the cabinetry. When modifying the exterior dimensions of your base cabinets, you must cross-reference National Kitchen & Bath Association (NKBA) planning guidelines to guarantee your new trim still allows for a strict minimum of 36 inches of functional walkway clearance.
Safety Disclaimer: DIY projects involve the use of power tools and materials that can cause injury. Always wear proper PPE (Personal Protective Equipment), read manufacturer safety manuals, and consult local building codes before modifying your home’s structure.
Mastering these cabinet mechanics is just the first step in overhauling your cooking space; discover how to tackle countertops, backsplashes, and layout planning in our complete room hub: DIY Kitchen Remodel Ideas: Stop Overpaying Pros

The Harvest Home Life Team is a collective of hands-on researchers and material evaluators dedicated to data-driven home improvement. Operating out of our active testing workshop, we deliver field-tested blueprints, rigorous tool diagnostics, and precise cut-lists. From calculating shear strength for load-bearing mounts to diagnosing structural deficiencies, we provide the objective data required to execute professional-grade DIY projects safely and effectively.