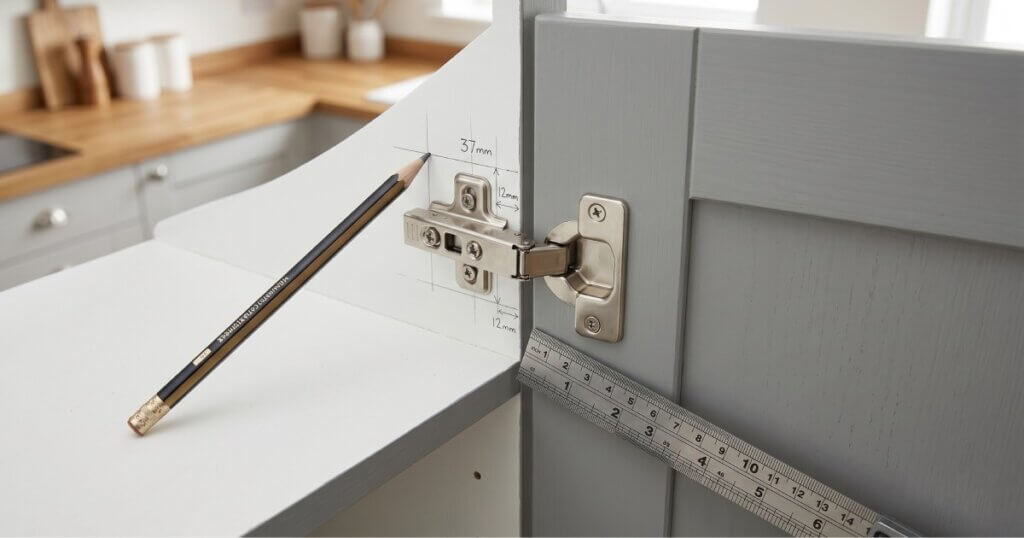
Project Brief
Upgrading to DIY soft-close cabinet hinges is the most budget-friendly way to silence slamming doors and modernize your kitchen. This step-by-step tutorial covers everything from measuring overlay articulation to installing heavy-duty undermount drawer slides, saving you hundreds in contractor fees while delivering a flawless mechanical finish.
Are Soft-Close Cabinets and Hinges Worth It?
Standard hardware is cheaper upfront, but it allows cabinet doors to repeatedly slam against the frame. Over time, this physical impact causes two major issues:
- Finish damage: The repeated striking causes micro-fractures and chips in the paint.
- Hardware failure: The force eventually pulls the hinge plate screws out of the wood.
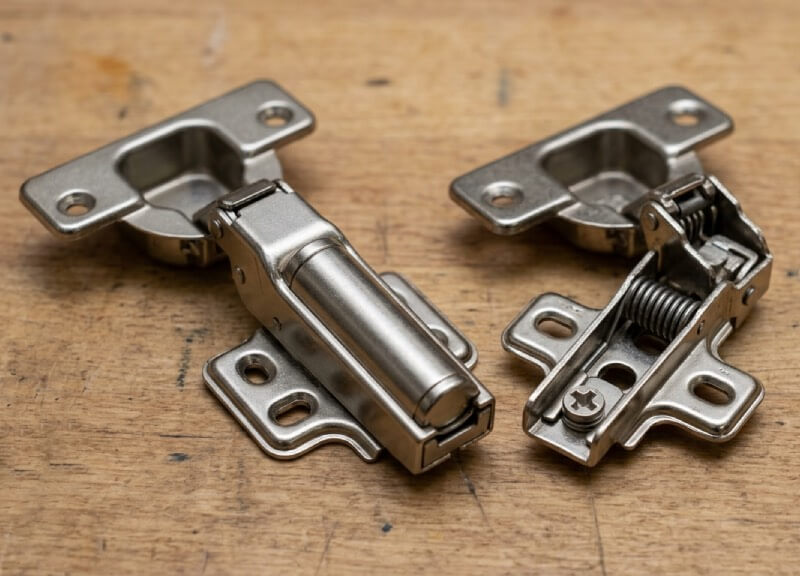
Soft-close models fix this using hydraulic dampers to absorb the physical shock entirely, preventing structural damage and extending the lifespan of your cabinets.
The Cost to Retrofit Soft-Close Cabinets
Understanding the cost to convert cabinets to soft close comes down to evaluating hardware prices versus contractor labor. If you hire a professional, the cost to install soft close hinges typically ranges from $15 to $25 per door in labor alone. Doing it yourself drops that to just the cost of the hardware (roughly $3 to $6 per hinge).
When factoring in the cost to replace drawer slides, expect to pay between $15 and $40 per pair for high-quality tracks, compared to a contractor quoting $75 to $100 per drawer for labor and materials.
| Upgrade Type | Average Contractor Cost (Per Unit) | DIY Hardware Cost (Per Unit) | Your Savings |
|---|---|---|---|
| Cabinet Hinge Replacement | $15 – $25 | $3 – $6 | ~$15 – $20 per door |
| Drawer Slide Replacement | $75 – $100 | $15 – $40 | ~$60 per drawer |
| Damper Add-On (Adapter) | $10 – $15 | $2 – $4 | ~$8 – $11 per door |
DIY Soft-Close Savings Calculator
Enter the number of hardware pieces your kitchen needs below to see your exact estimated savings.
How to Use the DIY Soft-Close Savings Calculator:
The Variables:
The Calculator in Action: If you are upgrading a standard kitchen with 14 slamming cabinet doors that need full hinges, and 4 clunky drawers, your process looks like this:
- Count your doors: Walk through your kitchen and count every door that slams = 14 doors.
- Count your drawers: Pull out your existing drawers to see how many need full track replacements = 4 drawers.
- Calculate your layout: Enter 14 into the first box and 4 into the second box of the tool above. (Leave the third box at 0).
Your precise estimated savings will be mapped instantly at the bottom of the calculator. The tool calculates the average local contractor labor rate versus the bulk cost of buying the hardware yourself, showing you exactly how much cash stays in your pocket.
When it comes time to order your hardware, always buy a “contractor pack” (usually sold online in bundles of 10, 20, or 50). Buying individual hinges or drawer slides off the shelf at a local big-box hardware store carries a massive retail markup that will quickly eat into these calculated DIY savings!
DIY Soft-Close Drawers vs. Buying New
| Approach | Cost Impact | When to Choose This Option | Expected Quality |
| Replacing Existing Tracks | Infinitely cheaper than buying premade boxes. | Your existing drawer boxes are still in perfectly good condition. | Retains your current box quality while upgrading the slide mechanics. |
| Building New Drawer Boxes | Maximizes savings compared to buying premade, though costs more than just buying tracks. | Your existing boxes are warped, made from cheap particleboard, or falling apart. | Yields a superior, custom-built product when utilizing materials like 1/2-inch Baltic birch plywood. |
Planning Your Upgrade: Hardware Compatibility
Soft-Close Cabinet Hinges for Old & Builder-Grade Cabinets
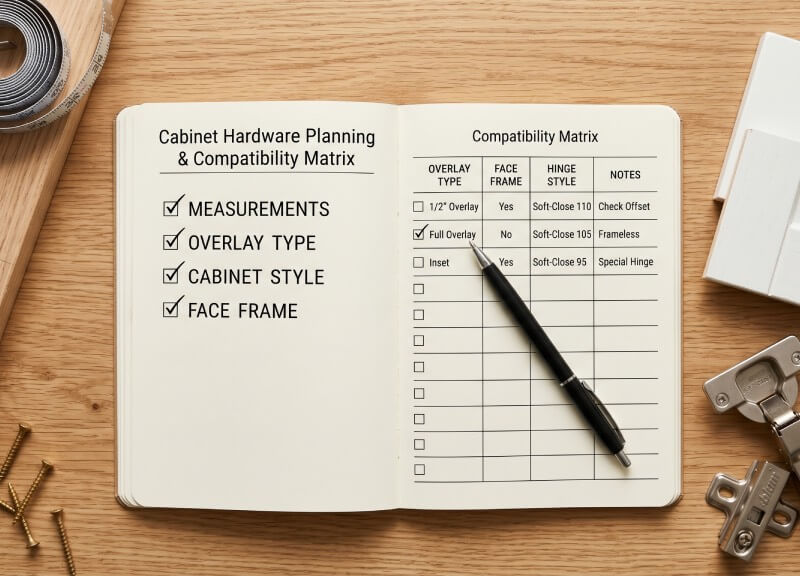
Before you purchase new hardware, you must identify your cabinet’s structural framing. Figuring out how to retrofit soft close hinges on builder grade cabinets starts with looking at the box itself.
There is a distinct mechanical difference between framed vs frameless cabinets. Frameless cabinets (often called Euro-style) do not have a wooden face frame attached to the front of the cabinet box; the door mounts directly to the interior wall.
Builders love frameless cabinets because they offer maximum storage space. If you have framed cabinets, your hinges will attach to a 1.5-inch solid wood face frame that borders the opening.
You cannot use a frameless hinge on a face-frame cabinet, as the mounting plate geometries are entirely different.
Understanding 1/2 Overlay vs. Full Overlay Hinges
| Hinge Configuration | Door Position & Visual Appearance | Common Application |
| Full Overlay | Door completely covers the cabinet frame, leaving almost no visible gap between neighboring doors. | Modern kitchens requiring a seamless look. |
| 1/2-Inch Overlay | Door covers exactly one half-inch of the cabinet frame, leaving the rest of the frame exposed. | Standard in older homes and traditional builds. |
| Inset | Door sits completely flush inside the cabinet frame rather than resting on top of it. | Custom cabinetry requiring highly specific inset hardware. |
Essential Tools for Cabinet Upgrades

To execute this installation with mechanical precision, you will need the following tools:
| Tool Required | Purpose / Best Practice |
| #2 Phillips Screwdriver | Manual is preferred over a drill to prevent stripping out MDF or particleboard. |
| Power Drill & 3/16″ Drill Bit | Used for creating precise pilot holes in the cabinet frame. |
| 35mm Forstner Bit | Necessary only if you are boring new hinge cup holes into blank doors. |
| Combination Square & Tape Measure | Essential for mapping out overlay and keeping hinge bodies perfectly straight. |
| Kreg Concealed Hinge Jig | Ensures accurate 35mm cup hole spacing and margin offsets. |
| Self-Centering Drill Bit (Vix Bit) | Guarantees your mounting screws are perfectly centered in the hardware plates. |
Step-by-Step Execution: How to Stop Cabinet Doors From Slamming
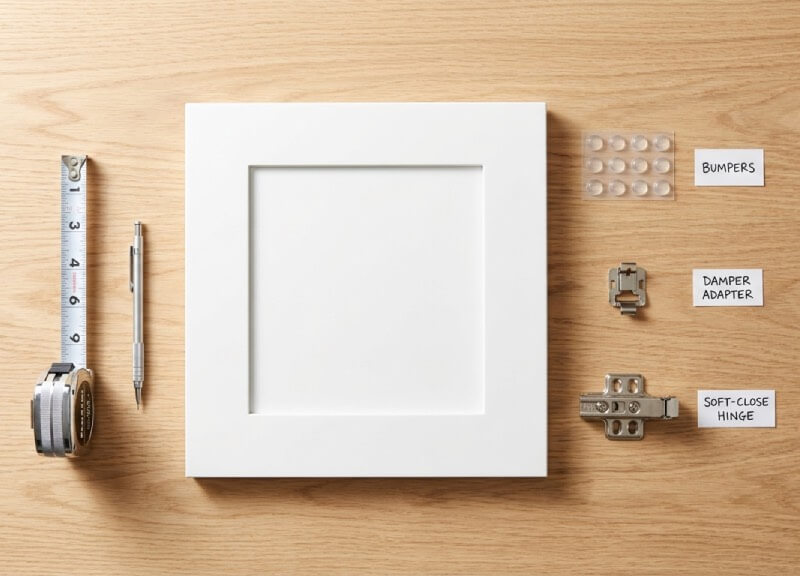
If you want to know how to stop doors from slamming, there are three options ranging from a 5-minute hack to a full mechanical upgrade.
1. The $5 Fix: Felt and Rubber Cabinet Door Bumpers
If you want to fix slamming kitchen cabinets cheap and fast, start with the contact points. Every cabinet door should have an acoustic buffer. The best cabinet door bumpers are made of clear, sound-dampening polyurethane.
Avoid cheap foam pads that compress and degrade over time. By applying quiet cabinet door bumpers to the top and bottom corners of the door’s interior, you eliminate the harsh wood-on-wood impact instantly.
2. How to Add Soft-Close Dampers to Existing Cabinet Hinges
If your current hinges are in perfect working order and you just want the soft-close feature, target the mid-tier budget option. You can buy soft close cabinet adapters that clip directly onto your existing Euro-style hinges, or discrete piston dampers that mount to the corner of the face frame.
Soft close cabinet door damper installation:
1: Position the Damper Mechanism: Place the standalone damper mechanism in the upper corner of the cabinet on the hinge side.
2: Check Piston Contact: Ensure the tip of the piston makes direct contact with the door when it is fully closed.
3: Drill and Secure: Drill a small pilot hole into the cabinet frame and secure the adapter with the provided screw.
4: Adjust the Closing Speed: Turn the tension dial on the back of the damper to adjust the hydraulic resistance and fine-tune the closing speed.
3. Retrofitting Existing Hardware (Full Hinge Replacement Tutorial)
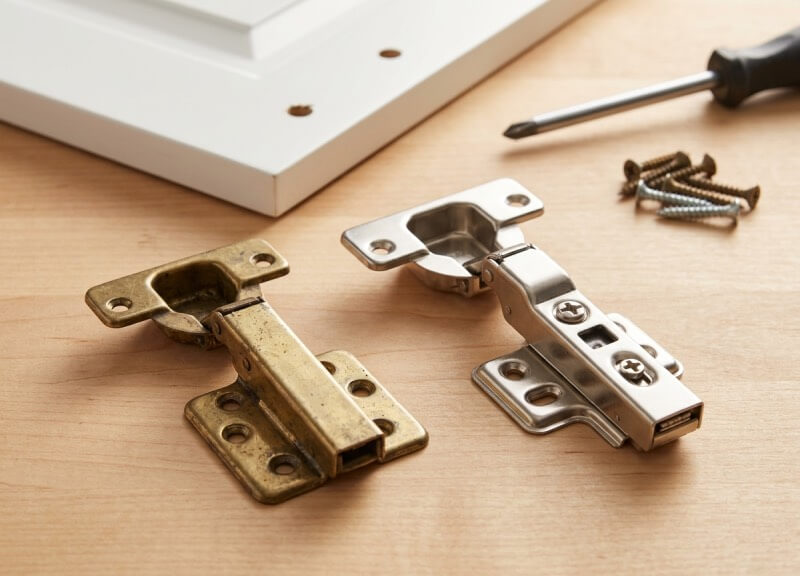
For the ultimate upgrade, here is the exact, step-by-step methodology for how to turn old cabinets into soft close by doing a complete hinge replacement.
1: Remove the Old Hardware Unscrew the hinge plate from the cabinet frame first. Always support the door’s weight with your free hand or a foot wedge so the screws do not tear out of the wood as they loosen. Once free, unscrew the hinges from the cup holes in the door.
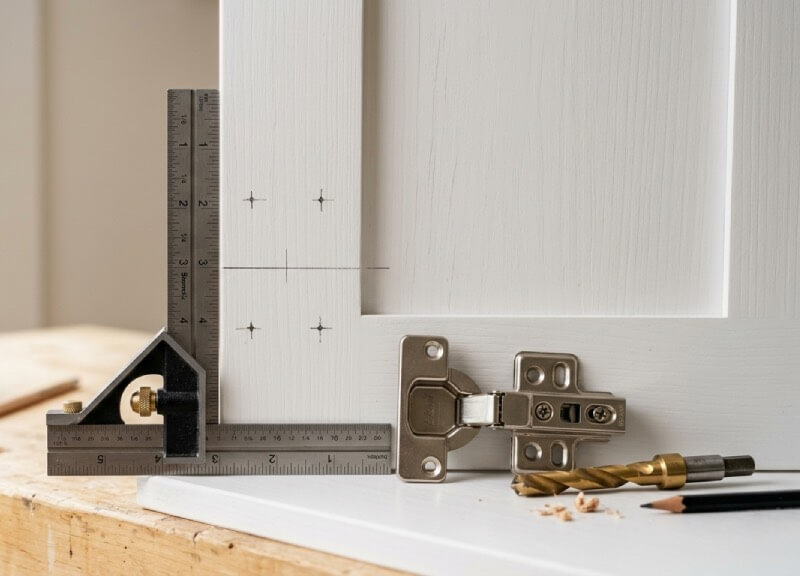
2: Prepare the 35mm Cup Holes (If Needed) If your old doors used exterior visible hinges, you will need to bore new holes. Attach a 35mm Forstner bit to a Kreg Concealed Hinge Jig. Set the jig’s offset cams to match the manufacturer’s required cup margin (usually 3mm to 6mm from the edge of the door). Clamp the jig exactly 3 inches from the top and bottom of the door, and drill down until the bit’s collar stops against the jig base.
3: Align and Square the New Hinges Drop your new soft-close hinges into the 35mm cup holes. Before securing them, place a combination square against the straight edge of the hinge body. Ensure the hinge is perfectly parallel to the door’s edge. If the hinge is rotated even slightly, it will bind against the cabinet frame. Pre-drill the two mounting holes with a self-centering Vix bit, then drive the screws in manually.
4: Mount the Door to the Cabinet Frame Hold the door up to the cabinet box. Use your pre-measured overlay marks (e.g., 1/2-inch from the inside edge of the frame) to position the mounting plate. Drill pilot holes into the face frame and drive the mounting screws. Always use a manual #2 Phillips screwdriver for the final turns to avoid stripping the wood.
4. Soft-Close Hinge Adjustment & Fine-Tuning
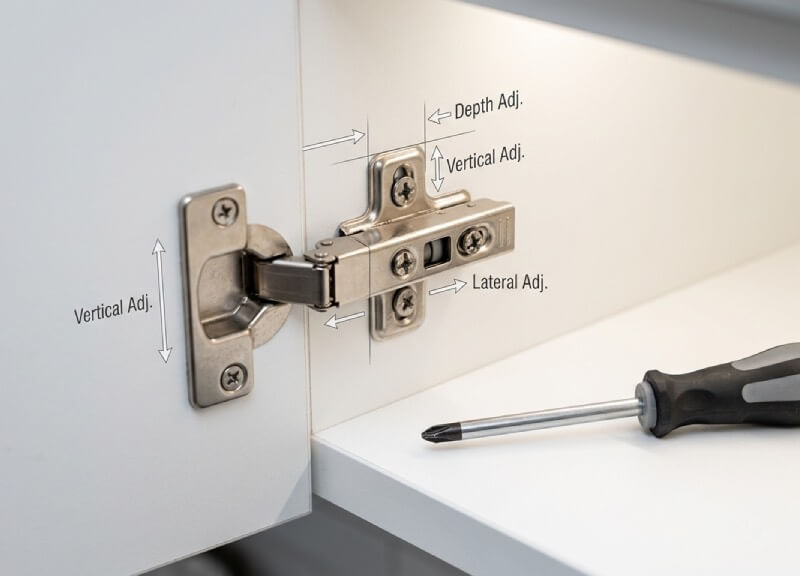
Once installed, your doors might look slightly crooked. Proper soft close hinges adjustment requires manipulating the three cam screws located on the hinge arm. If you want to know how to adjust soft closing cupboard doors to sit perfectly flush, follow these mechanics:
- Up/Down Adjustment: Loosen the mounting plate screws slightly to slide the door vertically, then retighten.
- Left/Right (Side) Adjustment: Turn the front screw on the hinge arm. This moves the door closer to or further from the neighboring door, fixing uneven gaps.
- In/Out (Depth) Adjustment: Turn the rear screw on the hinge arm to move the door closer to or further away from the cabinet box.
Step-by-Step Installation for Face Frame Cabinets (Undermount Tutorial)
Upgrading side-mount tracks to hidden undermount tracks requires specific modifications to your existing drawer boxes. Here is the exact methodology for how to replace side mount drawer slides with under mount hardware:
1: Check Your Drawer Box Clearances Undermount slides require exactly 1/2-inch of clearance beneath the drawer bottom, and the overall width of the drawer box must be exactly 5/8-inch narrower than the cabinet face frame opening. Measure carefully before proceeding.
2: Modify the Drawer Box (The Secret Step) Because the slides run underneath the drawer, you must notch the back of the wooden drawer box to allow the steel tracks to pass through. Using a jigsaw, cut a 1-3/8 inch wide by 1/2-inch tall notch into the bottom left and right corners of the drawer’s back panel.
3: Drill the Rear Anchor Pin Holes Undermount slides feature a metal pin at the back that stabs into the drawer box to hold it secure. Measure the location of this pin on your specific slide model, and drill a 6mm hole directly into the back of the drawer box above the notch you just cut.
4: Secure the Cabinet Tracks Remove the old hardware. Because face-frame cabinets have a void between the front frame and the back wall, you must attach metal rear-mounting brackets to the back of your new undermount slides. Rest the front of the slides on the face frame opening. Ensure they are perfectly level using a torpedo level, and screw the front tabs into the face frame. Extend the rear brackets to the back wall of the cabinet, double-check for level, and screw them into the cabinet back.
5: Attach the Locking Clips and Engage Flip your drawer box upside down. Screw the plastic undermount locking clips flush against the front inside corners of the drawer bottom. Finally, slide the drawer box onto the metal tracks until the locking clips click into the slide mechanisms.
Troubleshooting: Soft-Close Hardware Problems
How Do You Remove a Drawer From an Undermount Slide?
One of the most common frustrations is figuring out undermount drawer slides how to remove. Unlike older side-mounts where you just tilt the drawer up, undermount slides have a mechanical latch. For proper soft close cabinet drawer removal, open the drawer fully, reach underneath the front edge, and squeeze the orange or green plastic release triggers on the locking clips. While squeezing, pull the drawer straight out and up.
Why Do My Cabinet Drawers Stick After Painting?
If you recently remodeled, you will likely experience soft closing drawer slides problems where the drawer refuses to shut entirely. How to fix soft close drawer mechanism issues often comes down to friction. Sticking after painting happens when uncured acrylic enamel grips the face frame or the slide’s ball bearings get gunked up with sanding dust. Ensure your paint has fully cured (referencing the Sherwin-Williams technical data sheets for enamel cure times), wipe down the metal tracks with a TSP degreaser, and check out our master guide on painting kitchen cabinets for the topcoats required to prevent sticking.
Replacing Broken Hydraulic Dampers and Pistons
Soft-close mechanisms use tiny hydraulic cylinders that contain pressurized fluid or gas. Over years of use, the internal seals can fail, causing the piston to leak and lose its dampening resistance. When this happens, the door will slam shut just like a standard hinge. You cannot refill or fix these miniature cylinders. A quick maintenance checklist for older hardware is to simply unclip the broken hinge body and snap a replacement hinge directly onto the existing mounting plate—a repair that requires zero tools and takes less than 60 seconds.
FAQ
Q1: Are soft-close hinges worth it for older or builder-grade cabinets?
A. Yes, upgrading to soft-close hinges is highly worth it. Standard hinges allow wood to violently strike the cabinet frame, causing micro-fractures in the paint finish and eventually pulling the hinge plate screws out of the wood over time. Retrofitting your cabinets with hydraulic soft-close hardware completely absorbs this physical shock, preserving your door’s structural integrity, protecting your paint finish, and extending the lifespan of your cabinetry.
Q2: How much does it cost to convert standard cabinets to soft-close?
A. The cost to convert your cabinets to soft-close depends entirely on whether you hire a professional or choose the DIY route:
• DIY Cost: Roughly $3 to $6 per hinge (buying contractor packs in bulk drops this price significantly).
• Contractor Cost: Typically ranges from $15 to $25 per door in labor alone, excluding the marked-up price of the hardware.
• The Savings: By tackling this project yourself, you will save approximately $15 to $20 per cabinet door in professional labor fees.
Q3: Can you use frameless cabinet hinges on face-frame cabinets?
A. No, you cannot use a frameless hinge on a face-frame cabinet. Frameless cabinet doors mount directly to the flat interior wall of the cabinet box. Face-frame cabinets feature a 1.5-inch solid wood frame bordering the front opening, requiring entirely different mounting plate geometries. Always identify your cabinet box structure and overlay measurements before purchasing your upgrade hardware.
Q4: How do you adjust crooked soft-close cabinet doors that won’t sit flush?
A. You can easily realign crooked soft-close cabinet doors by manipulating the three cam adjustment screws located directly on the hinge arm:
• Up/Down (Vertical): Slightly loosen the mounting plate screws on the cabinet frame, slide the door vertically to align it with neighboring doors, and retighten.
• Left/Right (Side-to-Side): Turn the front screw on the hinge arm to adjust uneven gaps and bring the door closer to or further from adjacent cabinets.
• In/Out (Depth): Turn the rear screw on the hinge arm to close gaps between the door back and the face frame, ensuring the door sits completely flush.
A. Unlike traditional side-mount tracks where you tilt the drawer box upward, hidden undermount slides utilize a dedicated mechanical latching system.
1 Pull the drawer box completely out to its maximum extension.
2 Reach underneath the front edge of the drawer bottom.
3 Squeeze the two plastic release triggers (typically orange or green) located on the locking clips.
4 While holding the triggers open, pull the drawer straight out and up to lift it off the metal tracks.
Q6: Why do cabinet drawers stick or fail to close properly after painting?
When soft-close or undermount drawers stick after a kitchen remodel, it is usually caused by two common friction issues:
• Uncured Paint: Modern acrylic enamel paint can take several weeks to reach its full hardness. If doors or drawers are closed before the paint fully cures, the surfaces will physically grip the face frame.
• Debris in the Tracks: Sanding dust from the paint prep phase frequently gunks up the internal ball bearings of the slide tracks.
• The Fix: Clean the metal tracks thoroughly with a TSP degreaser, verify your paint’s total cure times against the manufacturer’s technical data sheets, and ensure you use high-quality non-stick topcoats.
Pro Tip: Upgrading your hardware is the fastest way to make old cabinets feel brand new. Want to take your budget remodel a step further? Read our complete guide to [How to Update DIY Kitchen Cabinets Without Replacing Them] for more high-ROI, contractor-free kitchen hacks.
Safety Disclaimer: DIY projects involve the use of chemicals, power tools, and materials that can cause injury. Always wear proper PPE (Personal Protective Equipment), read manufacturer safety manuals, and ensure proper ventilation.

The Harvest Home Life Team is a collective of hands-on researchers and material evaluators dedicated to data-driven home improvement. Operating out of our active testing workshop, we deliver field-tested blueprints, rigorous tool diagnostics, and precise cut-lists. From calculating shear strength for load-bearing mounts to diagnosing structural deficiencies, we provide the objective data required to execute professional-grade DIY projects safely and effectively.