Welcome to the DIY Kitchen Remodel Ideas Hub
You can complete a DIY kitchen remodel and save thousands by focusing strictly on surface-level cosmetic upgrades instead of structural demolition. The most cost-effective methods include painting existing cabinetry with urethane enamel, installing modern hardware, adding crown molding, and laying a new tile backsplash.
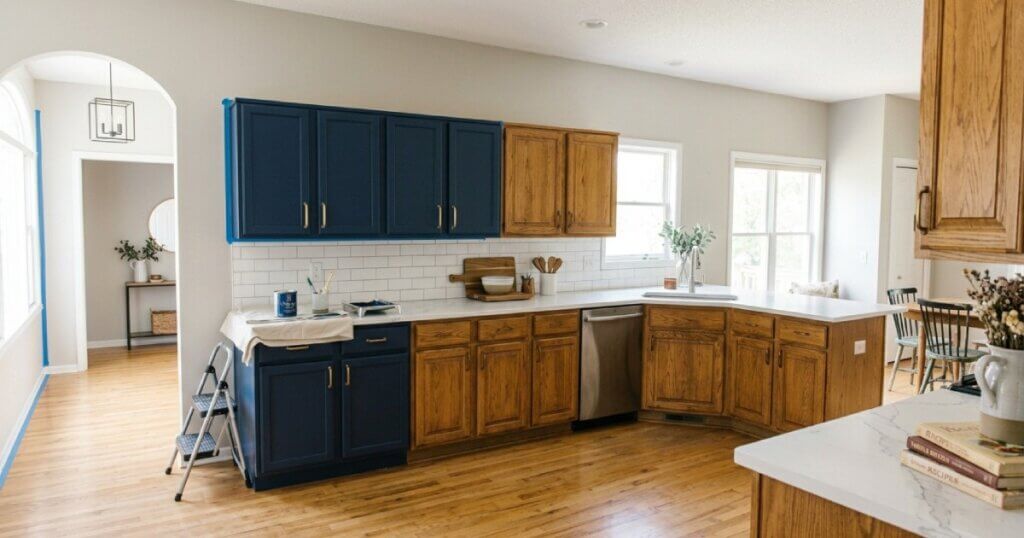
Our Workshop Philosophy: Change the Surface, Never the Layout
The most expensive mistake a DIYer can make is moving gas lines, plumbing, or load-bearing walls. Our philosophy is simple: preserve the footprint, transform the finish. By keeping your appliances and sink in their original locations, you save thousands in labor and permits, allowing you to reinvest that budget into premium materials like architectural trim and high-performance coatings
.
Our workshop operates on a strict “surface-and-finish” methodology. We believe that 80% of a kitchen’s perceived luxury comes directly from the quality of its cosmetic finishes and architectural trim. Before you tear out perfectly good framing, look at the data.
According to the 2026 Cost vs. Value industry metrics, minor surface-level kitchen upgrades yield an incredible 113% return on investment. Meanwhile, massive upscale remodels actually lose you money, recovering less than half of their cost due to inflated labor and material prices.
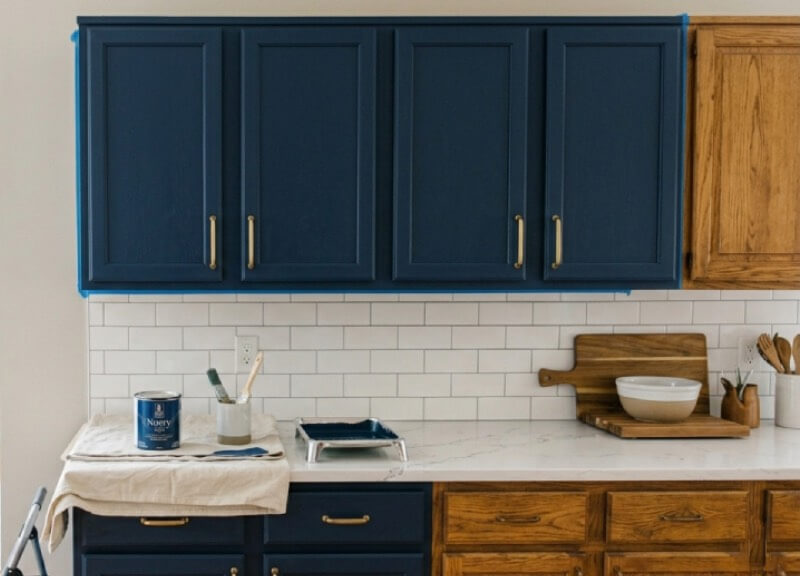
We teach you how to apply factory-grade chemical coatings to old wood, execute complex miter cuts for seamless trim, and use architectural math to make cheap big-box store upgrades look completely custom. We bypass the contractor markup by doing the unglamorous prep work ourselves, ensuring every project is structurally sound and built to last a lifetime.
Core Kitchen Upgrades
Cabinetry & Functional Storage
Standard builder-grade cabinets often leave an awkward gap at the ceiling. Installing architectural trim—specifically crown molding and riser blocks—creates a seamless, “to-the-ceiling” custom look. This is the single most effective way to make off-the-shelf cabinetry look like bespoke millwork.
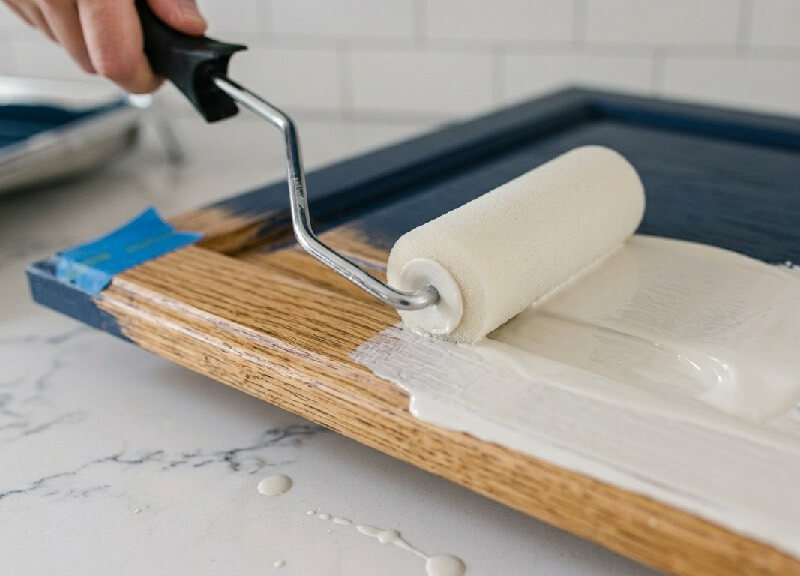
To achieve an indestructible, factory-grade shell, you have to use the right chemistry. We rely exclusively on Urethane Alkyd Enamels. This specialized coating combines the extreme hardness of traditional oil-based paints with the leveling properties and easier cleanup of modern acrylics. However, this level of durability requires serious safety protocols.
The EPA warns that indoor VOC levels can spike to 1,000 times normal background levels during paint application, which is why our guides mandate proper respirators and cross-ventilation.
Beyond the paint, true luxury is tactile. A kitchen doesn’t feel high-end if the cabinet hardware is crooked or if the drawers sag under the weight of your pots and pans. We focus heavily on the mechanical upgrades inside the cabinet boxes, utilizing specialized hardware jigs and heavy-duty steel drawer slides.
| Paint Formulation | Durability & Impact Resistance | Cure Time to Maximum Hardness | Best Application Method |
|---|---|---|---|
| Standard Interior Latex | Very Low (Stays rubbery, peels easily) | Never fully hardens | Walls only. Never use on cabinets. |
| 100% Acrylic Enamel | Medium-High (Good leveling, decent wear) | 14 to 21 Days | High-density foam roller or brush |
| Urethane Alkyd Enamel | Extreme (Factory-like, impact-resistant) | 21 to 30 Days | HVLP Paint Sprayer or Flocked Foam |
Cabinetry is typically the largest expense in any kitchen remodel. Instead of paying a contractor $15,000 for a full tear-out, you can chemically bond a factory-grade finish to your existing doors for under $300. Discover the exact materials and techniques to use in our step-by-step guide: How to Paint Kitchen Cabinets (No Sanding Required).
In this specific article, you will find detailed guides on:
- The Indestructible Cabinet Finish: Exact protocols for using liquid TSP alternatives to degloss wood, bonding primers, and spraying Urethane Alkyd.
- Cabinet Hardware Jigs: Mathematical formulas and template setups to ensure every single handle and pull is installed with millimeter precision.
- 100-lb Custom Pantry Drawers: Cut-lists and pocket-hole assembly instructions for building full-extension, heavy-duty pull-outs that won’t sag.
- Soft-Close Hinge Retrofitting: How to drill concealed hinge cups and upgrade 1990s face-frame cabinets to modern European soft-close standards.
The most expensive mistake homeowners make is assuming outdated doors mean the entire cabinet box is useless. Master the exact paint chemistry and hardware mechanics to save thousands in our dedicated guide: How to Update DIY Kitchen Cabinets (Without Replacing Them).
Architectural Trim & Custom Millwork
The defining feature of a cheap, builder-grade kitchen is the awkward 12-inch gap between the top of the upper cabinets and the ceiling. High-end, luxury kitchens feature cabinetry that extends seamlessly from floor to ceiling. You do not need to buy all-new cabinets to achieve this look; you simply need to master architectural millwork.
Our millwork guides teach you how to build MDF support framing above your existing cabinets and wrap it in seamless crown molding to create the illusion of custom, built-in cabinetry. We also tackle upgrading your kitchen island. Wrapping a plain drywall peninsula in custom beadboard, shiplap, or board-and-batten instantly anchors the room.

When expanding islands or adding thick overhangs with butcher block, spatial awareness is critical. We adhere strictly to the National Kitchen & Bath Association (NKBA) planning guidelines, which mandate a minimum 36-inch to 42-inch walkway clearance. We provide the exact math so your custom trim upgrades look proportional and maintain safe, functional traffic flow in the kitchen.
| Millwork Material | Expansion/Contraction Risk | Paintability | Best Kitchen Application |
|---|---|---|---|
| Standard Pine | High (Moves with humidity) | Moderate (Knots may bleed) | Rustic shelving, butcher block counters. |
| MDF (Medium Density Fiberboard) | Low (Highly stable) | Excellent (Zero wood grain) | Upper cabinet extensions, painted range hoods. |
| Cellular PVC Trim | Zero (Inert to moisture) | Good (Requires specific paint) | Baseboards near dishwashers or sinks. |
In this specific article, you will find detailed guides on:
- Closing the Cabinet Gap: Step-by-step blueprints for framing out the dead space above your upper cabinets and seamlessly wrapping it in fascia and crown molding.
- Faux-Wood Range Hoods: How to build a custom, decorative wooden cover to hide a cheap, standard stainless-steel vent insert.
- Kitchen Island Wrapping: Executing seamless outside corners when wrapping a builder-grade drywall island in beadboard or wainscoting.
- Butcher Block Installations: The mechanical realities of allowing for wood expansion when securing butcher block, and the exact food-safe mineral oil protocols to prevent cracking.
Want to make your basic cabinets look incredibly expensive without tearing them out? You can completely transform your kitchen just by upgrading the exterior trim. Learn how to close that awkward ceiling gap and build a faux-wood vent enclosure in our step-by-step [DIY Guide to Custom Kitchen Molding: Upgrading Builder-Grade Layouts].
Backsplashes & Low-Voltage Upgrades
A backsplash is the perfect mid-tier DIY project. For lasting results, use a modified thinset mortar rather than organic mastic, especially near high-heat zones like the range. Complement the tile with low-voltage under-cabinet lighting. These plug-in systems are safe, require no electrical permit, and eliminate the shadows that make kitchens feel small and dated.
Take tile installation, for example. Many beginners buy pre-mixed mastic adhesive in a bucket because it’s convenient. However, mastic is an organic adhesive that actually re-emulsifies (turns back into mush) if it gets consistently wet.
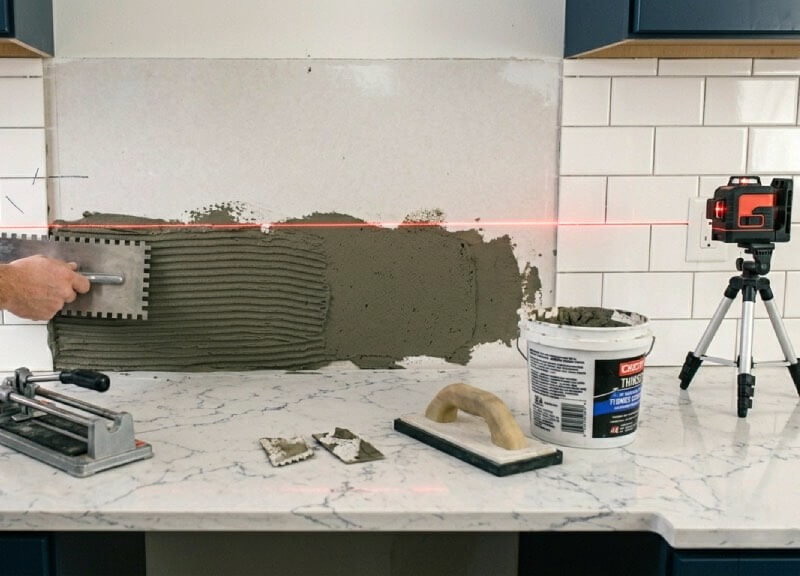
For a kitchen backsplash—especially near a boiling stove or high-humidity prep area—you must understand the difference between organic mastic and Portland cement-based thinset. We teach you how to mix unmodified thinset to the correct peanut-butter consistency to ensure your subway tile never sags.
When it comes to upgrading lighting, we strictly avoid hardwiring or messing with breaker boxes to keep our DIY projects safe and code-compliant. Instead, we utilize modern low-voltage systems. You can drastically modernize your space by installing ultra-thin, plug-in LED light channels under your cabinets, routing the low-voltage wires seamlessly out of sight for a custom-lit look without the electrician’s invoice.
| Adhesive Type | Composition | Moisture Resistance | Best Kitchen Application |
|---|---|---|---|
| Pre-Mixed Mastic | Organic glue | Very Poor (re-emulsifies) | Dry areas only. |
| Standard Thinset | Cement-based powder | Excellent (cures rock hard) | General backsplash, heavy ceramic tiles. |
| Modified Thinset | Cement + Latex Polymers | Superior (highly waterproof) | Glass tiles, large format tiles, high-humidity zones. |
In this specific article you will find detailed guides on:
- Subway Tile Backsplash Math: How to find your center line, use 1/8-inch horseshoe spacers, and mix polymer-modified thinset.
- Grout and Sealant Protocols: The difference between sanded and unsanded grout, and how to apply penetrating sealers so tomato sauce doesn’t permanently stain your backsplash.
- Low-Voltage LED Channeling: How to cut aluminum light channels, diffuse LED tape strips, and route ultra-thin power cables behind cabinet trim.
- Floating Shelving Mounts: The math behind finding hidden wall studs and using heavy-duty steel blind-shelf supports to hold dishware safely over tile.
For comprehensive material specifications, structural shelf-loading formulas, and safe low-voltage wiring protocols, consult our [Complete DIY Guide to Kitchen Backsplashes and Lighting] prior to beginning your finishing phase.
Essential Tools for Kitchen DIY Upgrades
A common rookie mistake is maxing out a credit card on commercial-grade cabinet saws or $500 air compressors just to get started. In reality, the tools required for surface-level kitchen remodels are highly accessible mid-tier essentials. The goal is to buy tools that provide accuracy over raw power.
- To achieve pro-level results, your tool kit needs precision.
- Cross-Line Lasers: Essential for perfectly level backsplash rows and cabinetry trim.
- Fine-Finish Sprayers: For that “factory” look on cabinet doors.
- Pneumatic Brad Nailers: For installing custom millwork without splitting the wood.
To install hardware, hang floating shelves, and align backsplashes, your primary investment should be in measurement. A self-leveling cross-line laser is non-negotiable; it replaces the standard bubble level and guarantees your cabinet pulls and tiles are perfectly horizontal across the entire room.

For assembly, an 18V cordless drill combined with a basic pocket-hole jig is all you need to build incredibly strong drawer boxes and custom shelving. When it comes to trim and architectural millwork, an 18-gauge brad nailer (battery-operated or a cheap pneumatic setup) will allow you to attach delicate crown molding and beadboard without splitting the wood.
Put your budget into high-quality consumables—like premium foam rollers, sharp carbide miter saw blades, and structural screws—rather than overpaying for a brand-name logo on a power tool.
“Accuracy in the workshop doesn’t come from a $1,000 tool; it comes from measuring twice, understanding your material tolerances, and never rushing the curing process.”
Expand Your Skills: The Master Interior DIY Guide
Transforming your kitchen is just the beginning. The exact same philosophy we used here—prioritizing precision over demolition and focusing on high-impact cosmetic upgrades—can be applied to every single room in your house.
If you are ready to tackle bathroom vanity upgrades, custom living room built-ins, and whole-house trim work without paying massive professional markups, you need to check out our core foundational guide.
Learn how to transform your entire home in our master pillar: 👉 Interior DIY Projects: Stop Overpaying Local Contractors
FAQ
What is the highest ROI DIY kitchen upgrade?
Refinishing your existing cabinets and replacing outdated hardware provides the highest return on investment. It drastically alters the kitchen’s aesthetic for the cost of paint and pulls, often recouping over 80% of its cost upon home resale.
Can I paint my kitchen cabinets without sanding them to bare wood?
Yes, you do not need to sand to bare wood, but you must “scuff-sand” to remove the factory sheen. Follow this with a high-bonding urethane alkyd primer to ensure the topcoat adheres permanently to the old finish.
How can I make standard kitchen cabinets look custom built?
The secret is adding architectural trim. Close the gap between the cabinet tops and the ceiling with crown molding, and add “skin” panels to the exposed ends of cabinet boxes to hide seams and create a flush, built-in appearance
What is the best adhesive for a kitchen backsplash?
For most ceramic and stone tiles, a polymer-modified thinset mortar is the best choice. It provides a stronger bond and better heat resistance than pre-mixed mastics, ensuring your tiles don’t sag or crack over time.
Are plug-in under cabinet lights safe to install yourself?
Absolutely. Because low-voltage plug-in kits use a standard outlet and a transformer, they do not require cutting into your home’s main electrical wiring, making them a safe and easy upgrade for any DIYer.
Safety Disclaimer: DIY projects involve the use of power tools and materials that can cause injury. Always wear proper PPE (Personal Protective Equipment), read manufacturer safety manuals, and consult local building codes before modifying your home’s structure.

The Harvest Home Life Team is a collective of hands-on researchers and material evaluators dedicated to data-driven home improvement. Operating out of our active testing workshop, we deliver field-tested blueprints, rigorous tool diagnostics, and precise cut-lists. From calculating shear strength for load-bearing mounts to diagnosing structural deficiencies, we provide the objective data required to execute professional-grade DIY projects safely and effectively.