Project Brief
Yes, you can paint kitchen cabinets without sanding by utilizing exact chemical bonding. To achieve a flawless, factory-like finish without creating harmful dust, you must follow this beginner-to-pro methodology:
- Degrease the wood with heavy-duty TSP.
- Etch the clear coat with a liquid chemical deglosser.
- Apply a self-leveling Urethane Alkyd hybrid enamel.
The ROI: Painting Kitchen Cabinets vs. Replacing
| Renovation Method | Average Cost (Standard Kitchen) | Contractor Required? | Structural/Plumbing Changes? |
|---|---|---|---|
| Full Cabinet Replacement | $15,000 – $25,000+ | Yes (Carpenters, Plumbers) | Yes (High disruption) |
| Cabinet Refacing (New Doors) | $5,000 – $9,000 | Often Yes | No |
| DIY Pro Painting (Hybrid Enamel) | $200 – $450 (Materials) | No | No |
The most expensive mistake homeowners make is assuming that outdated doors mean the entire wooden box is completely useless. Standard builder-grade cabinet boxes are almost always structurally sound.
When you look at painting kitchen cabinets vs replacing them, the numbers heavily favor the painter. A full demolition requires you to rip out countertops, reroute plumbing, move gas lines, and patch damaged drywall. By keeping the footprint exactly where it is, you skip the need for expensive municipal permits and specialized tradesmen.
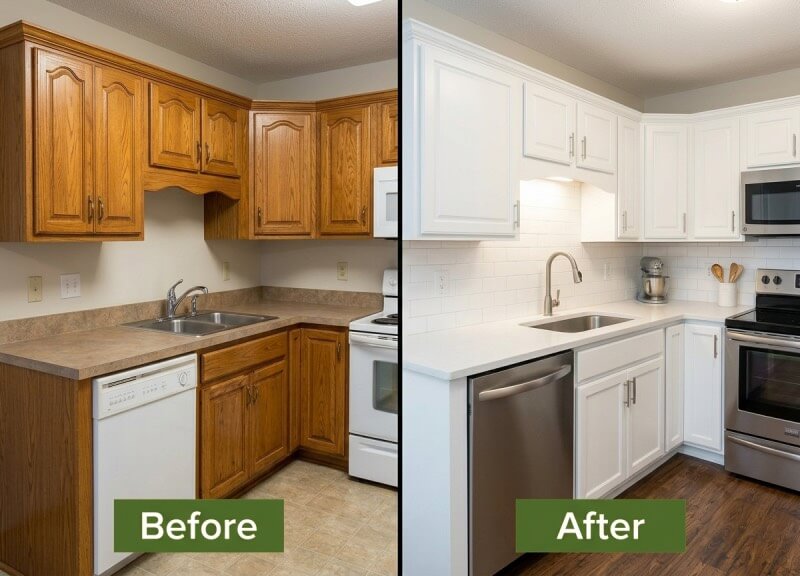
According to national data from Remodeling Magazine’s Cost vs. Value Report, keeping your existing cabinet boxes and focusing purely on surface upgrades yields a massively higher return on investment than a full upscale tear-out.
Our core “Surface-and-Finish” workshop philosophy bypasses the inflated markup of custom cabinetry. Even when comparing painting kitchen cabinets vs refacing (which involves buying brand-new custom doors), a proper hybrid enamel paint job cuts your kitchen cabinet cost down to a fraction of the price while delivering the exact same visual impact.
DIY vs. Pro ROI Calculator
Select your kitchen size below to see exactly how much money you save by utilizing our Surface-and-Finish method instead of hiring a contractor.
The Pro Prep Method: Chemical Deglossing (Skip the Sandpaper)
| Prep Method | Dust Created | Labor Intensity | Type of Primer Adhesion |
|---|---|---|---|
| Traditional Sanding | Extreme (Requires respirators & vacuums) | High (Days of physical labor) | Physical scratch profile |
| Chemical Deglossing | None | Low (Wipe on, scrub, wipe off) | Chemical micro-etching |
To paint kitchen cabinets without sanding, you must rely on exact chemical bonding rather than physical abrasion. Standard DIY advice tells you to spend days grinding down the old clear coat with orbital sanders, covering your house in harmful dust. We skip this entirely.
Instead, we use a liquid chemical deglosser. Liquid deglossers contain active solvents (like naphtha or ethyl acetate) designed to chemically soften and slightly dissolve the existing polyurethane or lacquer clear coat.
Instead of physically scratching the wood, these active solvents microscopically etch the surface, creating a tacky, porous layer that allows high-adhesion primer to chemically weld itself to the cabinet door.
However, a chemical deglosser cannot penetrate grease. Kitchens are naturally coated in aerosolized cooking oils (lipids) and invisible food splatter. You must aggressively wash the cabinets with a heavy-duty TSP (Trisodium Phosphate) degreaser before deglossing.
If you skip the TSP phase, the deglosser will just smear the grease around, the chemicals will never reach the clear coat, and your paint job will peel within months. Make sure to review guidelines from the EPA regarding safe chemical disposal when washing away heavy solvents and degreasers.
Materials Matter: Prepping Different Wood Grains
Not all wooden cabinets react to paint the same way. The chemical approach you take depends entirely on the physical texture of your starting material.
| Cabinet Material | Physical Trait | Specific Prep Required | Required Primer Type |
|---|---|---|---|
| Oak / Ash | Open, heavy grain | Squeegee water-based grain filler into pores. | Standard high-adhesion bonding primer. |
| Maple / Birch | Tight, smooth grain | Standard TSP wash and chemical deglosser. | Standard high-adhesion bonding primer. |
| Knotty Pine | Softwood, contains tannins | Standard TSP wash and chemical deglosser. | Heavy-duty shellac-based primer (blocks yellowing). |
| MDF Ends | Flat, no wood grain | Apply real wood veneer with contact cement. | Standard high-adhesion bonding primer. |
Filling Heavy Oak Grain
Oak is an open-grain wood. It features deep, porous veins and heavy texture. Paint naturally shrinks as it cures.
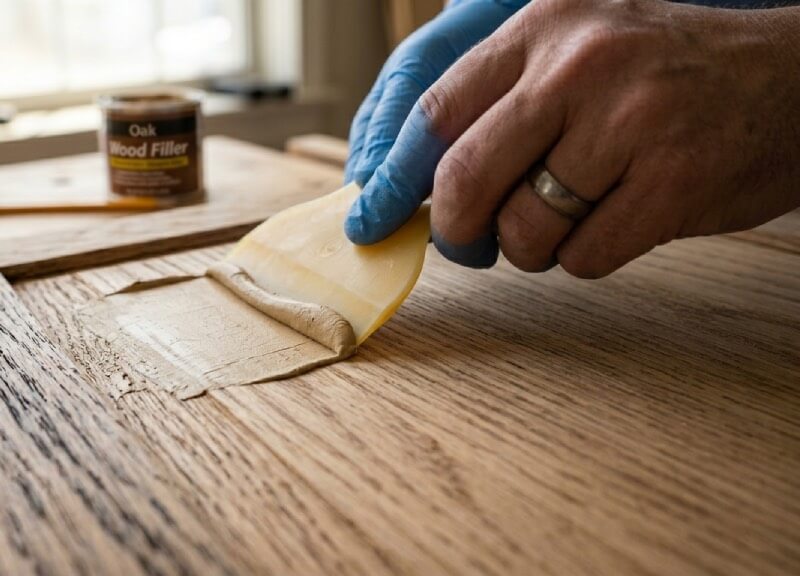
If you simply roll hybrid enamel over un-prepped oak, the paint will sink into those deep pores, leaving you with an aggressive texture that looks like cheap, painted plastic.
To bridge this deep texture, you must apply a water-based grain filler using a plastic squeegee. You force the putty into the open pores, allow it to dry, and lightly scuff it perfectly flat. This completely hides the oak texture, setting the stage for a smooth, modern shell.
Painting Maple, Birch, and Pine
Tight-grain woods like maple and birch are a painter’s dream. They have tightly packed, microscopic pores that feel like glass.
You do not need to use any grain filler on these materials; a thorough TSP wash and chemical deglosser will prep them perfectly. Pine, however, is a softwood that presents a unique chemical risk. Pine knots contain natural tannins and sap.
If you apply a standard water-based primer over knotty pine, those tannins will eventually bleed straight through the coating, leaving yellow stains on your fresh paint. To prevent this, knotty pine requires a heavy-duty shellac-based primer(like B-I-N) to permanently lock those tannins in place.
Applying Real Wood Veneer to MDF Ends
Many builder-grade kitchens feature solid wood doors, but the exposed sides of the cabinet boxes are made of cheap, flat MDF (Medium-Density Fiberboard). MDF has zero grain and looks completely out of place when painted next to real wood.
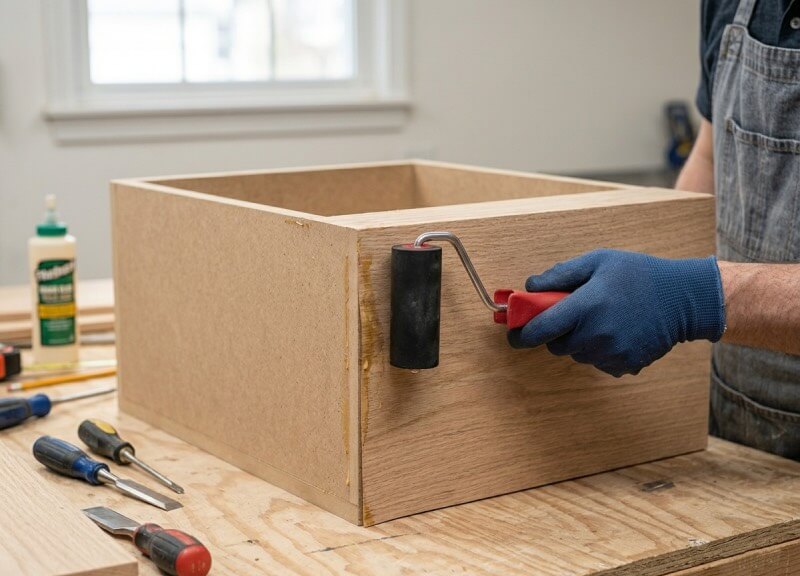
To make these flat, builder-grade boxes look like custom solid hardwood, you apply a peel-and-stick real wood veneerdirectly over the MDF ends. Using a specialized contact cement and a heavy J-roller, you press the veneer onto the box.
The pressure-sensitive adhesive (PSA) bonds perfectly without bubbling, allowing you to prime and paint the end panel so it matches your doors flawlessly.
The Chemistry: Why We Use Urethane Alkyd (Hybrid) Enamel
Painting your DIY kitchen cupboards involves intense chemistry, not just brushing on a new color.
Traditional interior acrylic latex paints are designed for drywall. They remain pliable and slightly rubbery, meaning they will easily peel, chip, and dent when subjected to fingernails, rings, and the daily impact of a high-traffic kitchen.
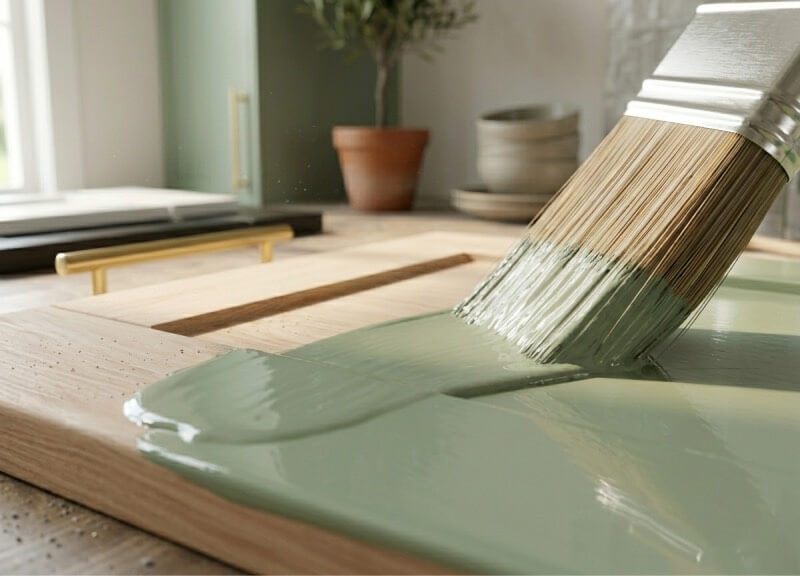
To achieve an indestructible, factory-like shell, you must use a Urethane Alkyd Enamel (often called hybrid cabinet enamel).
This specific chemical formulation suspends heavy-duty oil resins in a water base. As the water evaporates, the oil resins cross-link and oxidize, leaving behind a self-leveling, impact-resistant finish.
| Coating Chemistry | Durability Rating | Cure Time to Max Hardness | Leveling Capability |
|---|---|---|---|
| Standard Acrylic Latex | Low (Chips easily) | 14 Days | Poor (Shows brush strokes) |
| Traditional Oil (Alkyd) | High (Prone to yellowing) | 30 Days | Excellent |
| Urethane Alkyd Enamel | Extreme (Impact resistant) | 21-30 Days | Superior (Self-leveling) |
The Curing Rule: Dry time and cure time are vastly different. Hybrid enamel feels dry to the touch in 4 hours, but it requires 21 to 30 days to reach its maximum chemical hardness. Handle your newly painted doors with extreme care during this first month.
Gel Stain vs. Chemical Paint for Oak DIY Cabinets
A common, disastrous myth in the DIY community is that you can use gel stain like paint to cover old oak. Gel stain is formulated to sit on top of a surface, rather than soaking in like a traditional wood stain.
If you apply thick layers of gel stain over an improperly deglossed clear coat, the solvents inside the gel become trapped and cannot off-gas properly.
The chemical result is a gummy, tacky finish that easily scratches off and may literally never fully dry. Urethane alkyd enamel is chemically engineered to avoid this exact failure, curing into a rock-hard shell.
Choosing the Best Colors for Your Kitchen
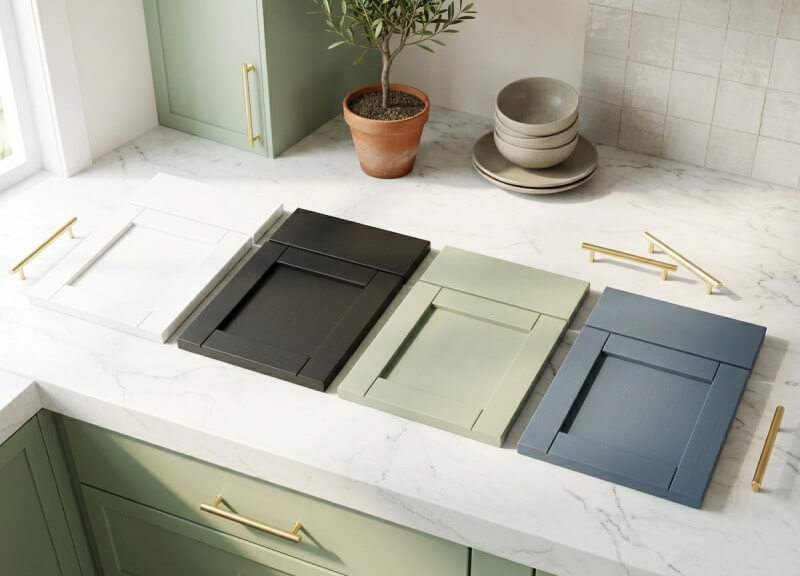
The color you choose dictates the primer you buy, the exact application technique you must follow, and how much daily maintenance your kitchen will require.
| Cabinet Color | Visual Impact & Mood | Light Reflection | Maintenance & Prep Constraints |
|---|---|---|---|
| Classic White | Timeless, makes small spaces feel expansive. | High: Brightens dark rooms heavily. | High: Shows grease easily. Requires premium high-hide primer over dark wood. |
| Deep Black | Bold, modern, and grounds large, open spaces. | Low: Absorbs light. Requires strong overhead/under-cabinet lighting. | Medium: Hides food splatter, but highlights dust and brush strokes. Self-leveling enamel is mandatory. |
| Earthy Tones(Sage, Slate Blue) | Calming, organic, and highly modern. | Medium: Softens harsh lighting without darkening the room. | Low: The most forgiving option. Hides fingerprints and daily wear exceptionally well. |
Painting Kitchen Cabinets White
White is the undisputed classic. It instantly brightens small spaces and offers the highest universal resale value. However, painting kitchen cabinets white is chemically demanding. White paint contains very little pigment to hide underlying stains.
If you are painting over dark oak or cherry, you must use a high-quality, high-hide bonding primer. Without a premium primer, the dark wood tones will require four or five coats of white enamel to achieve full coverage.
Painting Kitchen Cabinets Black
Painting kitchen cabinets black provides a massive, modern visual impact, but it exposes mechanical flaws. Dark colors absorb light, which immediately highlights physical imperfections, dust nibs, and brush strokes.
If you are going dark, utilizing a self-leveling cabinet paint like a hybrid enamel is absolutely mandatory. The enamel physically melts together as it dries, flattening out roller marks to create a flawless, modern shell.
Trending Shades (Green, Grey, and Blue)
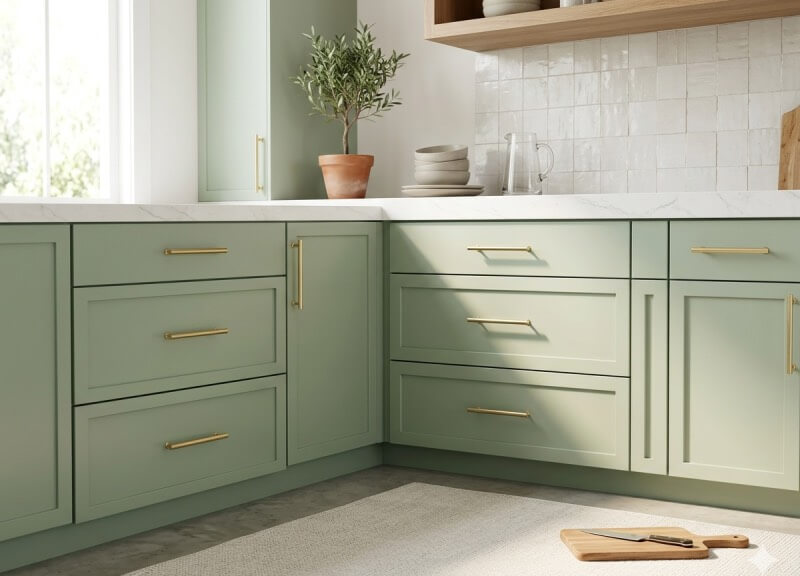
For a modern DIY remodel that stands out, homeowners are leaning heavily into rich, earthy tones. Sage greens, slate blues, and light grays are incredibly popular right now.
These mid-tone colors are highly forgiving. They cover old wood tones much faster than stark white and hide daily dirt and fingerprints far better than deep black.
The Application: Foam Rollers vs. Sprayers
| Application Tool | Final Finish Quality | Prep & Masking Time | Paint Thinning Required? | Best For… |
|---|---|---|---|---|
| High-Density Foam Roller | Very Good (Slight stipple) | Low (Just drop cloths) | No (Use straight from can) | Small kitchens, tight budgets, beginners. |
| HVLP Turbine Sprayer | Flawless (Factory Shell) | High (Must tape off entire room) | Yes (5-10% distilled water) | Large kitchens, pro-level results, fast application. |
You can absolutely achieve a beautiful finish using high-density foam cabinet rollers.
Foam rollers prevent the heavy stippling texture caused by standard woven nap rollers. However, to graduate from a good finish to a true, flawless factory shell, you need to use an HVLP (High Volume Low Pressure) paint sprayer.
HVLP Sprayer Thinning Ratios for a Factory Finish
Urethane alkyd enamels are incredibly thick. If you pour them straight out of the can into an HVLP system like the Wagner Control Spray Max, the gun will struggle to atomize the heavy fluid. This causes the gun to spit and sputter, leaving your doors covered in a bumpy “orange peel” texture.
To achieve a flawless spray, you must understand exact HVLP sprayer thinning ratios.
- The Thinning Agent: Use distilled water, not tap water. Tap water contains heavy minerals that can negatively react with the enamel’s chemistry.
- The Ratio: Most hybrid cabinet enamels require a 5% to 10% thinning ratio.
- The Viscosity Cup Test: Every good HVLP gun comes with a viscosity cup (a small plastic funnel). Dip the cup into your thinned paint and time how long it takes for the fluid to completely drain out the bottom hole. For optimal atomization in a standard DIY turbine sprayer, you are aiming for a run-out time of 30 to 40 seconds. If it takes longer, add a tiny splash of distilled water and test again.
Cabinet Paint Volume Calculator
Enter your kitchen details below to find out exactly how much material you need to buy to guarantee a factory finish.
Step-by-Step Execution Guide
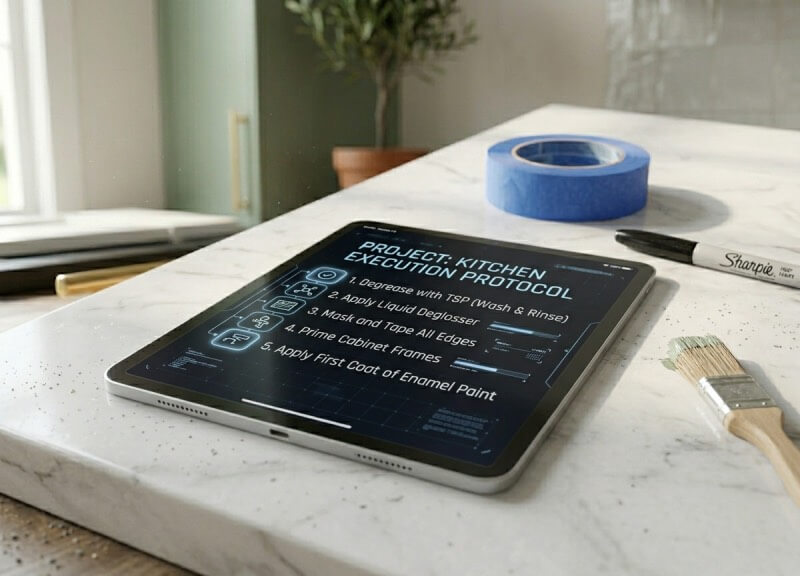
To ensure your chemical bonds do not fail, you cannot rush the process. Follow this exact order of operations to guarantee a factory finish that will last for years.
| Project Phase | Active Labor Time | Required Wait / Dry Time |
|---|---|---|
| TSP Wash & Rinse | 1 - 2 Hours | 1 Hour (Wood must be completely dry) |
| Chemical Deglossing | 1 Hour | 15 - 30 Minutes (Check bottle specs) |
| Bonding Primer (1 Coat) | 1 - 2 Hours | 2 - 4 Hours |
| Hybrid Enamel (2 Coats) | 2 - 3 Hours | 4 - 6 Hours between coats |
| Curing Phase | Minimal | 21 - 30 Days for maximum hardness |
Step 1: Disassemble and Label Everything
- Do not attempt to paint your cabinet doors while they are still attached to the boxes; you will get drips, runs, and a terrible finish around the hinges.
- Remove all doors, drawers, and hardware.
- Write a number on a piece of painter's tape and stick it inside the hinge hole of the door, and place the matching hardware in a plastic baggie with the same number.
- When it is time to reinstall, every door will go back to its exact, perfectly aligned box.
Step 2: The TSP Degreasing Wash
- Mix your heavy-duty TSP (Trisodium Phosphate) powder with warm water according to the manufacturer's ratio.
- Using a standard scouring sponge, aggressively scrub every inch of the wood, paying special attention to the wood directly above the stove and around the handles where finger oils gather.
- You must rinse the cabinets with plain, clean water and a clean rag immediately after. If TSP residue dries on the wood, your primer will not stick.
- Let the wood dry completely before moving on.
Step 3: Apply the Liquid Chemical Deglosser
- Put on your safety gloves and ensure the room is well-ventilated.
- Pour your liquid chemical deglosser onto a lint-free abrasive pad (like a maroon Scotch-Brite pad).
- Scrub the chemical into the old clear coat using firm, circular motions. The solvent will quickly soften the old finish.
- Wipe away the chemical sludge with a clean rag or tack cloth.
- When dry, the wood should look completely dull and feel slightly "tacky" to the touch.
Step 4: Patching, Grain Filling, and Veneer (The Material Variables)
Now you must address your specific material:
- If you have Open-Grain Oak: Apply a water-based grain filler with a plastic squeegee, pressing it deep into the pores. Scuff it flat once dry.
- If you have Flat MDF Ends: Now is the time to apply your peel-and-stick real wood veneer using contact cement and a J-roller to create a faux-wood surface.
- For all cabinets: Fill any old hardware holes with wood filler if you are changing your handle sizes.
Step 5: Apply the Bonding Primer (The Color & Wood Variables)
Your primer choice dictates the success of your final color.
- If painting White over dark wood: Use a premium high-hide bonding primer so you don't have to paint five coats of white later.
- If painting Black or dark colors: Ask the paint desk to tint your primer gray. This drastically reduces the number of dark coats you will need.
- If painting over Knotty Pine: You absolutely must use a heavy-duty shellac-based primer (like B-I-N) to trap the natural tannins and prevent yellow bleed-through.
Apply one coat using a brush for corners and a foam roller for flats. Let it dry for 2 to 4 hours.
Step 6: Roll or Spray the Hybrid Enamel
- If using a foam roller: Apply the paint in long, even strokes. Avoid the temptation to over-roll it once it starts drying, as this will introduce air bubbles. (This is especially critical if you chose Black, which highlights roller marks).
- If using an HVLP sprayer: Thin your hybrid enamel with distilled water, verify your 30 to 40-second viscosity cup run-out time, and apply a light coat with 50% overlap.
Wait 4 to 6 hours (check your specific can) before applying the second and final coat.
Step 7: The Curing and Reinstallation Phase
- Let the final coat dry for a strict 24 to 48 hours before you attempt to move the doors.
- Carefully carry them back to the kitchen, reinstall the hinges, and hang them on the boxes.
- Remind your family that while the paint feels dry today, Urethane Alkyd enamel requires a full 21 to 30 days to reach its maximum chemical hardness. Be gentle, wipe spills immediately, and avoid scrubbing the doors during this first month.
FAQ
Q. How long does hybrid cabinet enamel take to fully cure?
A. Hybrid cabinet enamel takes 21 to 30 days to fully cure. While the paint will feel completely dry to the touch in just 2 to 4 hours, the chemical cross-linking process requires up to a month to reach maximum, factory-grade hardness. Handle newly painted doors gently during this period to prevent scratching.
Q. Can I use gel stain instead of paint over old oak cabinets?
A. No, you should not use gel stain directly over old cabinet clear coats. Gel stain is designed to sit on top of a surface rather than penetrating it. If applied over an improperly prepped or deglossed finish, the solvents become trapped, resulting in a tacky, gummy layer that easily scratches off.
Q. Is a TSP wash required before using a liquid chemical deglosser?
A. Yes, a heavy-duty TSP (Trisodium Phosphate) wash is strictly required. Kitchen cabinets are coated in invisible, aerosolized cooking greases. If you skip the TSP wash, the liquid deglosser cannot penetrate this grease barrier to chemically etch the clear coat, which guarantees your primer will eventually peel.
Q. What is the correct thinning ratio for spraying cabinet enamel in an HVLP gun?
A. The ideal thinning ratio for spraying hybrid cabinet enamel is 5% to 10% using distilled water. This ensures optimal atomization without breaking down the paint's chemical binders. You should aim for a run-out time of 30 to 40 seconds when using the viscosity cup included with your HVLP sprayer.
Q. How do you stop pine knots from bleeding through white cabinet paint?
A. You must use a heavy-duty, shellac-based primer to permanently stop pine knots from bleeding. Natural tannins in knotty pine and cedar will easily bleed through standard water-based primers, leaving brown or yellow stains on your white paint. Shellac locks these oils into the wood before you apply your final enamel coats.
Taking Your Remodel to the Next Level: Transforming your kitchen cabinets with a factory-grade hybrid enamel is one of the most cost-effective ways to modernize your home, but it is just one piece of the puzzle. If you are planning to upgrade your countertops, backsplash, or flooring next, check out our comprehensive guide to How to Update DIY Kitchen Cabinets (Without Replacing Them). Or, if you are currently mapping out a massive whole-house transformation, head over to our ultimate DIY Kitchen Remodel Ideas: Stop Overpaying Pros to learn how to sequence your projects, manage contractors, and maximize your property's value.
Safety Disclaimer: DIY projects involve the use of chemicals, power tools, and materials that can cause injury. Always wear proper PPE (Personal Protective Equipment), read manufacturer safety manuals, and ensure proper ventilation.

The Harvest Home Life Team is a collective of hands-on researchers and material evaluators dedicated to data-driven home improvement. Operating out of our active testing workshop, we deliver field-tested blueprints, rigorous tool diagnostics, and precise cut-lists. From calculating shear strength for load-bearing mounts to diagnosing structural deficiencies, we provide the objective data required to execute professional-grade DIY projects safely and effectively.