
How to Use the Crown Molding Calculator
This crown molding angle calculator and material takeoff tool computes exact compound miter and bevel saw settings, net and gross linear footage with corner cutoff waste, retail board counts, consumable supplies, and fully adjusted installation labor costs.
Step 1: Configure Geometry, Saw Setup & Ceiling Pitch Inputs
Define your saw orientation, molding profile dimensions, and ceiling geometry to generate exact compound miter and bevel angles.
- Cutting Method Orientation: Choose between cutting the molding laying flat on the saw table or nested upside-down against the fence.
- Spring Angle & Profile Setup: Select a preset spring angle (38.0°, 45.0°, or 52.0°) or input exact ceiling projection and wall drop fractions.
- Corner & Pitch Geometry: Choose flat, rake-to-horizontal, or cathedral peak transitions and enter your measured wall corner and ceiling pitch angles.
- Corner Direction & Trim Style: Specify inside mitered, inside coped, sharp outside miter, or 3-piece bullnose wrap joints.
Step 2: Enter Room Dimensions & Physical Material Sub-Types
Input your room measurements, corner counts, and material specs to calculate total board footage and fastener requirements.
- Room Perimeter & Ceiling Height: Enter your total room perimeter length and ceiling height above the floor in whole inches and 1/16″ fractions.
- Corner Counts & Bullnose Width: Input total inside and outside corner counts, plus the corner drop-piece width if wrapping bullnose corners.
- Board Length & Waste Buffers: Select your retail board stock length (96″, 144″, or 192″) and set your waste factor and contingency percentages.
- Molding & Wall Backing Materials: Choose your crown molding material (MDF, pine, hardwood, polyurethane, or plaster) and wall framing surface type.
Step 3: Set Cost, Consumables & Financial Contingency Inputs
Enter local trim prices, finishing supply costs, and labor rates to build a complete project budget estimate.
- Material Pricing Mode: Choose to price your molding per linear foot or per retail board and enter the unit cost.
- Fasteners & Adhesives: Input local retail prices for 1,000-count fastener boxes and 10 oz caulk or construction adhesive tubes.
- Finishing Supplies: Enter unit costs for 8 oz wood filler or spackle tubs and gallons of trim paint and primer.
- Installation Labor Mode: Select DIY installation or hired finish carpentry and enter the base carpenter labor rate per linear foot.
Understanding Your Crown Molding Results
1. Saw Settings & Cut Chart Outputs
The calculator converts U.S. tape-measure fractions to decimal inches by dividing 16ths by 16. It then applies trigonometry to your wall drop and ceiling projection to generate exact compound miter and bevel angles.
- Spring Angle (Wall | Ceiling): Determines the exact resting angle of the molding profile against your wall and ceiling.
- Saw Miter | Saw Bevel Setting: Displays exact flat compound or nested fence angles for standard, bullnose, and vaulted corners.
- Rec. Molding Profile Face Size: Recommends a proportional crown face width rounded to the nearest 1/16″ based on ceiling height.
- Nested Cuts: Lock your saw bevel at 0.00° and hold the molding upside-down firmly against the fence.
- Coped Inside Corners: Cut Piece 1 square at 0.00° and use standard miter settings on Piece 2 to expose the profile line.
- 3-Piece Bullnose Wraps: Divide the main corner angle in half and add 90° before computing your miter and bevel settings.
| Cut Scenario / Output | Trigonometric Formula / Rule | Angle Notes & Adjustments |
|---|---|---|
| Spring Angle | arctan(Ceiling Projection / Wall Drop) × (180 / pi) | Complementary ceiling angle equals 90° minus the wall spring angle. |
| Flat Compound (Standard & Bullnose) | Miter: arctan(sin(Spring) / tan(Corner / 2)) | Bevel: arcsin(cos(Spring) × cos(Corner / 2)) | 3-piece bullnose wraps adjust the effective corner angle to 90° + (Corner / 2). |
| Flat Compound (Vaulted Transitions) | Miter: arctan(cos(Spring) / tan(Vault / 2)) | Bevel: arcsin(sin(Spring) × cos(Vault / 2)) | Bottom transition uses 180° – Pitch; cathedral ridge uses 180° – (2 × Pitch). |
| Nested / Upside-Down Against Saw Fence | Miter: |90° – (Effective Corner / 2)| | Bevel: Locked at 0.00° | Applies to both flat ceiling corners and vaulted transition angles. |
| Inside Corner — Coped | Piece 1: 0.00° square cut | Piece 2: Standard inside corner settings | Exposes the profile edge on Piece 2 for hand back-beveling with a coping saw. |
| Rec. Molding Profile Face Size | (Ceiling Height in Inches / 12) × 0.55 | Rounded to the nearest 1/16″ on a standard U.S. tape measure. |
2. Material Quantity & Retail Conversion Outputs
Every mitered corner consumes extra linear stock beyond the raw wall measurement due to ceiling projection and a 2/16″ saw kerf. The calculator adds this corner waste to your room perimeter before converting totals into retail trim packages.
- Net Footage (Dec. | Tape): Shows true linear footage including corner projection add-ons before adding your safety waste factor.
- Gross Linear Footage (w/ Waste): Increases net footage by your selected waste percentage to cover offcuts and milling defects.
- Retail Boards | Purchased LF: Divides gross footage by board length and rounds up to full retail trim sticks.
- Min. Scarf Joints | Fastener Boxes: Calculates required mid-wall board splices and total 1,000-count finish nail boxes.
- Caulk Tubes | Filler | Paint: Estimates exact 10 oz caulk tubes, adhesive tubes, 8 oz wood filler tubs, and paint gallons.
| Material / Supply Item | Allocation Formula / Coverage Rate | Packaging & Substrate Rules |
|---|---|---|
| Corner Stock Add-On | (Outside × 2 × Ceiling Proj.) + (Inside × Ceiling Proj.) + (Bullnose × Bullnose Width) | Added to room perimeter in inches and divided by 12 for Net Footage. |
| Min. Scarf Joints | Purchased Retail Boards minus (Inside Corners + Outside Corners) | Minimum value is locked at 0 if corner count exceeds board count. |
| Fastener Count | 2 nails every 16″ on-center + 4 nails per corner or scarf joint | Packed into 1,000-count boxes (zeroed out for Plaster or Polystyrene). |
| 10 oz Caulk & Adhesive | Caulk: 1 tube per 25.0 lin. ft. | Adhesive: 1 tube per 40.0 lin. ft. | Adhesive added for steel studs, lath and plaster, polyurethane, or plaster cove. |
| Wood Filler & Finish Paint | 8 oz Filler: 1 tub per 150.0 lin. ft. | Paint: 1 gallon per 400.0 lin. ft. | Calculated from Gross Linear Footage and rounded up to whole retail containers. |
3. Project Financial & Contingency Outputs
Financial outputs combine retail material pricing with complexity-adjusted professional installation rates. Labor costs automatically scale based on trim material density, wall framing substrate, ceiling height, and roof pitch.
- Board Cost | Supplies Cost: Multiplies purchased trim and consumable packages by your unit prices for exact material totals.
- Adjusted Pro Labor Cost: Multiplies net footage and base labor rate by material, wall surface, and ceiling height factors.
- Base Subtotal | Contingency: Combines material, supply, and labor costs alongside your custom percentage risk buffer.
- EXACT TOTAL PROJECT COST: Sums your base project subtotal and contingency reserve into a final turnkey estimate.
- Effective Cost Per Linear Foot: Divides total project cost by net linear footage to reveal your true installed rate.
| Cost Factor Category | Multiplier / Formula Breakdown | Application Rules |
|---|---|---|
| Trim Material Multipliers | 1.00x MDF/Pine | 1.35x Hardwood | 0.85x Polyurethane | 1.25x Plaster | Multiplied directly against the base professional labor rate per linear foot. |
| Wall Surface Multipliers | 1.00x Wood Studs | 1.20x Steel Studs | 1.40x Lath & Plaster | Accounts for heavy-duty fastening and adhesive work on dense wall substrates. |
| Height & Pitch Multipliers | 1.00x Base | +0.25 for Ceilings > 120″ | +0.20 for Vaulted Pitch > 0.0° | Additive modifiers (e.g., a vaulted ceiling over 120″ applies a 1.45x factor). |
| Total Cost & Unit Rate | Total = Subtotal + (Subtotal × Contingency %) | Unit Rate = Total / Net Footage | Establishes turnkey project budget and true installed cost per linear foot. |
Always verify whether your molding profile has a 38.0°, 45.0°, or 52.0° spring angle before locking in your miter saw stops, and account for corner projection cutoffs so you never come up half a board short on your final wall run.
CONTRACTOR QUICK CHECKLIST: LABOR & BUDGET DRIVERS
• Scaffold & Pitch Surcharges: Ceilings above 120″ (+0.25x) and vaulted slopes (+0.20x) stack additively to cover staging time.
• Substrate Prep: Lath and plaster walls require a 1.40x labor multiplier plus construction adhesive every 40.0 lin. ft.
• True Installed Cost: Always divide your final turnkey total by Net Footage—not Gross Footage—to benchmark accurate per-foot bids.
Tools & Materials Needed
Layout & Cutting Tools Needed
Use these precision layout and cutting tools to measure corners and cut tight joints.
• Compound Miter Saw: 10″ or 12″ Dual-Bevel Compound Miter Saw with an 80-tooth or 100-tooth ultra-fine crosscut carbide blade.
• Angle Finder: Digital Protractor / Digital Angle Finder (for measuring out-of-square drywall corners and ceiling pitches).
• Coping Tools: Coping Saw with fine-tooth high-carbon steel blades and a Half-Round Wood Rasp.
Fastening & Finishing Tools Needed
Keep these fastening and prep tools on hand to anchor trim into framing and finish seams.
• Finish Nailer: 15-Gauge Angled Finish Nailer or 16-Gauge Straight Finish Nailer with Air Compressor (or cordless equivalent).
• Framing Layout Gear: Magnetic / Electronic Stud Finder, 25-ft Tape Measure, Chalk Line, and Combination Square.
• Prep & Caulking Tools: 1/8″ Nail Set Punch, Putty Knife, and Dripless Caulking Gun.
Crown Molding Retail Boards & Primary Stock
Select your retail board stock length and molding material species to match your room runs and finish grade.
| Component | Material Specification & Dimensions |
|---|---|
| Crown Molding Retail Boards | 96″ (8 ft), 144″ (12 ft), or 192″ (16 ft) lengths (Primed MDF, Finger-Jointed Solid Pine, Stain-Grade Oak/Maple/Cherry, High-Density Polyurethane, or Plaster Cove) |
| Continuous Backing Blocks | 1×4 solid pine nailer block around the perimeter for profiles over 5-1/2″ wide or parallel ceiling joists |
Hardware, Fasteners & Finishing Consumables Needed
Pair your trim boards with the proper structural fasteners, joint adhesives, and finishing supplies.
• Structural Finish Nails & Screws: 2″ to 2-1/2″ 15-Gauge or 16-Gauge Galvanized Finish Nails (or #8 x 2-1/2″ Self-Drilling Trim-Head Screws for steel studs).
• Miter & Scarf Pinning Supplies: 1″ 18-Gauge Brad Nails and Cyanoacrylate (CA) Instant Miter Adhesive with Activator Spray (for pinning scarf joints and outside miters).
• Caulk & Construction Adhesive: 10 oz Tubes of Paintable Siliconized Acrylic Latex Caulk (plus Heavy-Duty Polyurethane Construction Adhesive for masonry, steel framing, or foam trim).
• Filler & Abrasive Sponges: 8 oz Tub of Sandable Latex Wood Filler or Lightweight Spackling Paste, plus 120-grit and 220-grit Sanding Sponges.
• Primer, Paint & Stain Finishes: 1 Gallon of High-Hide Interior Latex Trim Primer and Semi-Gloss Acrylic Enamel Trim Paint (or Wood Conditioner, Oil-Based Stain, and Clear Polyurethane for hardwood).
Always check local building codes and HOA guidelines before starting.
How much crown molding do I need?
To find how much crown molding you need, measure your room perimeter in inches, add 1x ceiling projection per inside corner and 2x ceiling projection per outside corner for miter cutoff loss, and divide by 12 for net linear feet.
Add 10.0% to 15.0% waste before rounding up to whole retail boards. Use the interactive calculator above to compute your exact compound miter and bevel angles, board takeoff, and total installation budget.
Crown Molding Project Overview
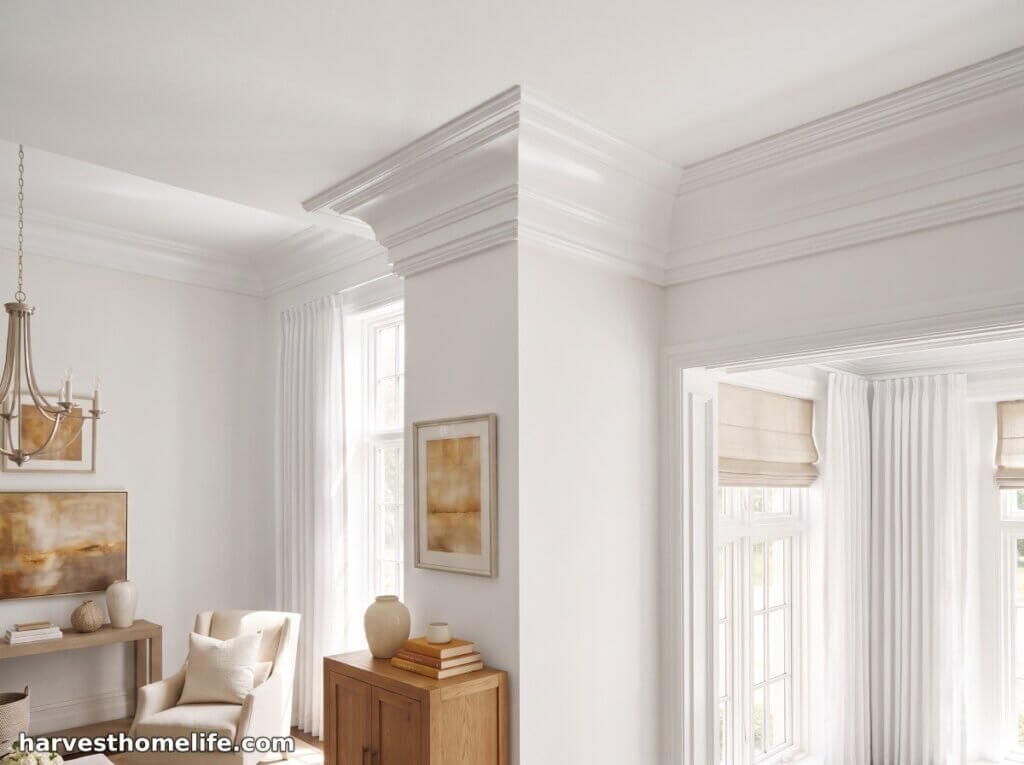
Why Two-Plane Crown Geometry Requires Exact Calculation
Running a dedicated crown molding calculator before stepping up to the miter saw prevents miscut trim and mid-project lumberyard runs. Unlike flat baseboard or casing that sits flush against a single wall plane, crown molding bridges the ceiling and wall at a tilted diagonal known as the spring angle.
Because the trim leans out from the wall—most commonly at 38.0°, 45.0°, or 52.0°—every turn requires simultaneous two-plane geometry. Using a precision crown molding angle calculator translates your exact wall corner angle and ceiling pitch into dual-bevel compound saw settings while accounting for the wood triangles lost on every cutoff.
- Inside & Outside Corners: Accounts for the angled projection of the trim across standard 90° and out-of-square walls.
- Bullnose Corner Wraps: Splits wide rounded drywall turns into two shallower transitions with a matching filler piece.
- Vaulted Cathedral Peaks: Adjusts blade tilt and table rotation where sloped ceilings meet flat walls or ridge beams.
Linking Room Takeoffs to Retail Board Stock & Substrates
Beyond saw blade geometry, an accurate takeoff must link room dimensions to real-world hardware store stock and substrate physics. Ordering raw perimeter footage plus a blind percentage leaves finish carpenters short when spanning long walls with 96″, 144″, or 192″ boards that require overlapping beveled scarf joints.
Your true crown molding cost per foot shifts substantially based on trim density, wall framing, and ceiling elevation. Combining an exact crown molding cut chart with a substrate-specific material and labor matrix ensures your cuts fit tight and your estimate holds firm.
- Verify Spring Angle First: Confirm whether your profile sits at 38.0°, 45.0°, or 52.0° before locking in compound saw settings.
- Account for Scarf Overlaps: Add extra linear footage when joining 96″, 144″, or 192″ boards along continuous walls.
- Price the Substrate: Adjust your $7.50 per foot base labor upward for ceilings over 120″, hardwood stock, or lath-and-plaster walls.
| Project Variable | Standard Baseline Spec | High-Complexity Spec |
|---|---|---|
| Common Spring Angles | 38.0° or 45.0° standard profiles | 52.0° steep colonial or custom plaster profiles |
| Retail Board Lengths | 96″ (8 ft) or 144″ (12 ft) stock | 192″ (16 ft) long-run contractor packs |
| Material & Substrate | Primed MDF nailed into wood top plates | Stain-grade hardwood anchored into lath-and-plaster |
| Elevation & Base Labor | $7.50 / lin. ft. base labor (8 ft ceilings) | Surcharges applied for heights above 120″ (10 ft) |
Crown Molding Cut Chart, Sizing & Installation Reference Guide
Use these contractor reference tables and structural fastening protocols to set your compound miter saw accurately, lock in tight joints, and budget materials across any ceiling profile.
What Are the Standard Crown Molding Cut Chart Angles for 38°, 45°, and 52° Profiles?
Proper saw setup depends on whether you cut your trim flat on the table or nested against the fence. Because residential drywall corners rarely sit at a true 90.0°—often varying from 88.0° to 92.0° due to tape and mud buildup—always verify the angle before cutting.
- Cutting Flat on the Table: Place the bottom wall-contact edge firmly against the fence while setting the turntable miter angle and blade tilt bevel angle.
- Cutting Nested (Upside-Down): Rest the ceiling-contact edge on the saw base with the bottom wall edge pointing up against the fence and the bevel locked at 0.00°.
- Measure First: Check every drywall turn with a digital angle finder to catch 88.0° to 92.0° mud buildup.
- Recalculate or Split: Enter the exact degree into the calculator or split the deviation in half on your saw scale.
- Index the Wall Edge: Always keep the bottom wall-contact edge pressed tight against the saw fence during every cut.
| Corner / Joint Geometry | Spring Angle (S) | Flat Miter Angle (M) | Flat Bevel Angle (B) | Nested Miter (0.00° Bevel) |
|---|---|---|---|---|
| 90.0° Standard Corner (In/Out) | 38.0° | 31.62° | 33.86° | 45.00° |
| 90.0° Standard Corner (In/Out) | 45.0° | 35.26° | 30.00° | 45.00° |
| 90.0° Standard Corner (In/Out) | 52.0° | 38.24° | 25.81° | 45.00° |
| 135.0° Bay Window / 90.0° Bullnose | 38.0° | 14.30° | 17.55° | 22.50° |
| 135.0° Bay Window / 90.0° Bullnose | 45.0° | 16.32° | 15.69° | 22.50° |
| 135.0° Bay Window / 90.0° Bullnose | 52.0° | 18.08° | 13.62° | 22.50° |
| 4/12 Vaulted Rake Transition (18.43°) | 38.0° | 7.26° | 5.69° | 9.22° |
| 4/12 Vaulted Rake Transition (18.43°) | 45.0° | 6.54° | 6.50° | 9.22° |
| 4/12 Vaulted Rake Transition (18.43°) | 52.0° | 5.70° | 7.25° | 9.22° |
How Do You Prevent Scarf Joint Separation, Out-of-Plumb Gaps, and Stud Misses?
Whenever a wall run exceeds your 96″, 144″, or 192″ retail board length, join the boards using an overlapping 30.0° beveled scarf joint positioned directly over a wall stud and ceiling joist. Never butt square ends together in mid-span.
Because crown molding sits hollow across the wall-to-ceiling junction, firing nails straight into the middle of the profile will crush the trim and crack the joint. Instead, follow specific fastening targets and inside corner coping rules to prevent separation.
- Glue & Cross-Pin Scarf Seams: Coat both 30.0° scarf faces with PVA wood glue or cyanoacrylate (CA) adhesive and cross-pin with framing and brad nails.
- Angle Fasteners Into Framing: Drive finish nails near the bottom flat to hit the double top plate and the top flat to reach ceiling joists.
- Install Continuous Backing Blocks: Fasten a 1×4 solid pine nailer block around the perimeter for profiles over 5-1/2″ wide or parallel ceiling joists.
- Cope Wood Inside Corners: Butt Piece 1 square against the wall and back-cut Piece 2 with a coping saw so wood shrinkage never exposes a dark gap.
| Installation Task | Fastener / Tool Spec | Angle & Penetration Rule |
|---|---|---|
| Scarf Joint Structural Pin | Two 2″ or 2-1/2″ 15-gauge finish nails | Driven through the 30.0° bevel directly into the stud and joist. |
| Scarf Joint Face Lock | Two 1″ 18-gauge brad nails + PVA or CA glue | Pinned through the molding face to lock the seam against movement. |
| Wall & Ceiling Anchoring | 2″ to 2-1/2″ 15-gauge or 16-gauge finish nails | Penetrate at least 3/4″ into solid framing behind 1/2″ drywall. |
| Wide Profile Backing | Continuous 1×4 solid pine nailer block | Required on profiles exceeding 5-1/2″ face width or parallel joists. |
| Coped Inside Corner | Coping saw on standard inside corner miter | Piece 1 cut at 0.00°; Piece 2 back-cut at a 15.0° to 30.0° relief angle. |
CONTRACTOR QUICK CHECKLIST: FRAMING & JOINT LOCKUP
• Never Nail the Hollow Center: Keep 15-gauge or 16-gauge nails strictly on the top and bottom contact flats to avoid crushing the profile.
• 3/4″ Minimum Bite: Use 2″ to 2-1/2″ nails to clear 1/2″ drywall and sink at least 3/4″ into the double top plate and joists.
• Back-Cut Coped Joints: Carve a 15.0° to 30.0° relief angle behind the profile line on Piece 2 so the sharp face edge fits tight.
How Do Ceiling Height, Material Type, and Wall Backing Affect Crown Molding Cost Per Foot?
Selecting the right profile width and material species dictates both visual proportion and installation labor rates. Multiplying ceiling height in feet by 0.55 yields the ideal profile face width: 4-3/8″ to 4-1/2″ for 96″ (8-ft) ceilings, 5-1/2″ for 120″ (10-ft) ceilings, and 6-5/8″ for 144″ (12-ft) ceilings.
Primed MDF and Solid Pine establish the 1.00x carpentry baseline on standard wood studs and 1/2″ drywall. Switching to Stain-Grade Hardwood adds a 1.35x labor multiplier for pre-drilling and zero-putty coping.
Lath & Plaster walls add a 1.40x surface multiplier, ceilings above 120″ add +0.25 for scaffolding, and vaulted slopes add +0.20.
| Crown Molding Material Sub-Type | Retail Board Price / LF | Labor Multiplier | Fastener & Adhesive Spec | Installed Cost / LF (8-ft / 4-3/8″ to 12-ft / 6-5/8″) |
|---|---|---|---|---|
| Primed MDF (Medium Density Fiberboard) | $1.75 – $3.50 | 1.00x Baseline | 2″ 15/16-ga finish nails, PVA glue on scarfs, latex caulk | $10.50 – $15.50 / lin. ft. |
| Solid Pine / Finger-Jointed Softwood | $2.50 – $5.00 | 1.00x Baseline | 2″ to 2-1/2″ 15/16-ga finish nails, wood glue, latex caulk | $11.50 – $17.50 / lin. ft. |
| Stain-Grade Hardwood (Oak, Maple, Cherry) | $5.50 – $12.00 | 1.35x Difficulty | Pre-drilled 15-ga finish nails, coped joints, color-matched putty | $17.50 – $29.00 / lin. ft. |
| High-Density Polyurethane / PVC Foam | $3.50 – $8.50 | 0.85x Difficulty | Polyurethane construction adhesive + 18-ga brad nails, CA glue | $11.00 – $19.00 / lin. ft. |
| Plaster / Extruded Polystyrene Cove | $4.00 – $14.00 | 1.25x Difficulty | Glue-only installation (0 nails), heavy-duty adhesive & joint compound | $15.00 – $28.50 / lin. ft. |
Frequently Asked Questions
Q. How to calculate crown molding angles?
A. To calculate compound crown molding angles for flat cuts, divide your measured wall corner angle (W) by 2. Calculate the miter angle as M = arctan(sin(S) / tan(W/2)) and the bevel angle as B = arcsin(cos(S) * cos(W/2)), where S is the molding’s spring angle from the wall (typically 38.0°, 45.0°, or 52.0°).
Q. What size crown molding do I need for 10-foot ceilings?
A. For 10-foot (120″) ceilings, install a crown molding profile with a face width of 5-1/2″ (or between 5-1/4″ and 6″). Finish carpenters calculate proportional crown molding width by multiplying the ceiling height in feet by 0.55, ensuring the trim visually balances the vertical wall expanse without overwhelming the room.
Q. How much does a finish carpenter or handyman charge in labor cost to install crown molding per linear foot?
A. A finish carpenter or handyman charges $4.50 to $12.00 per linear foot for crown molding installation labor, with a national baseline average of $7.50 per linear foot for primed MDF or pine on standard 8-foot drywall. Stain-grade hardwood (1.35x), lath-and-plaster walls (1.40x), ceilings over 10 feet (+25.0%), and vaulted pitches (+20.0%) increase labor rates.
Planning your next project? Browse our master hub of DIY Home & Garden Calculators to get instant material lists, spacing math, and budget estimates.