
How to Use the Cabinet Door Size Calculator
This cabinet door calculator converts raw cabinet box opening measurements into exact exterior door dimensions, 5-piece Shaker joinery cut lists, 35mm hinge boring coordinates, and complete material and labor cost estimates.
Step 1: Configure the Cabinet Opening and Overlays
Set up your cabinet box framework, opening measurements, and target door clearances.
- Select your Cabinet Construction Style (such as Face Frame or Frameless), Door Configuration, and Quantity of Identical Cabinet Openings.
- Enter the Cabinet Opening Width and Height in whole inches and 1/16″ tape measure fractions.
- Choose your Application Type (Overlay Door vs. Inset Door) and set your Left, Right, Top, and Bottom Overlays independently.
- Set your Center Reveal / Perimeter Inset Gap and toggle the 3/32″ Inset Door Stop / Bumper Cushion Allowance for inset doors.
Step 2: Set Shaker Frame, Slab, and Joinery Specs
Define your door construction style, frame joinery dimensions, and material waste allowances.
- Select your Door Build / Order Mode (such as DIY Build – 5-Piece Shaker or Custom Order) and Door Material Thickness.
- For 5-piece Shaker builds, enter Stile Width and Rail Width, Joinery Tongue / Groove Depth, and Center Panel Expansion Space.
- Choose your Center Panel Material Type (such as 1/4″ Plywood or 3/4″ Solid Wood Raised Panel) with a 3/8″ rear rabbet width.
- Select your 1-Piece Slab Edge Banding Thickness (such as 1/32″ Veneer Tape) and confirm the Material Waste Factor.
Step 3: Enter Concealed Hinge and Hardware Drilling Specs
Configure your 35mm hinge cup drilling offsets and pull handle bore spacing.
- Select your Hinge Style (Compact Face-Frame Hinge vs. Long-Arm Euro Hinge + Mounting Plate).
- Input your Desired Hinge Cup Bore Margin / Tab K (from 1/8″ to 1/4″) and Top & Bottom Hinge Placement Offset from Door Edge.
- Select your Pull / Knob Hardware Type (such as Single-Hole Knob or Two-Hole Pull) and Pull Hardware Center-to-Center Bore Spacing (such as 3″ or 5″ / 128mm).
Step 4: Input Material, Hardware, and Labor Costs
Enter local lumber prices, custom door order fees, and installation rates to calculate project costs.
- Enter local pricing for Stile & Rail Lumber Price per Board Foot, Center Panel / Slab Sheet Price per 4×8 Sheet (32.0 sq. ft.), or Tempered Glass Insert Price per Sq. Ft.
- For custom orders, input the Custom Pre-Made Door Base Price per Sq. Ft., Glass-Ready / Mullion Frame Upcharge per Door, and Pre-Boring / Hinge Cup Drilling Fee per Door.
- Add your Concealed Hinge Price per Pair and Knob / Pull Hardware Price per Piece.
- Enter your Finish Carpenter / Refacing Labor Rate per Door ($0.00 for DIY) and an Unforeseen Contingency Buffer.
Understanding Your Cabinet Door Size Results
Finished Door Cut Dimensions
This section displays Total Doors Required, plus Single Finished Door Width and Height in both 1/16″ tape measure fractions and strict decimals. It also calculates your Area per Door and Total Project Door Square Footage.
| Door Configuration | Width Formula | Height Formula |
|---|---|---|
| Single Overlay Door | Opening Width + Left Overlay + Right Overlay | Opening Height + Top Overlay + Bottom Overlay |
| Double Butt Overlay Doors | (Opening Width + Left & Right Overlays – 1/8″ Center Reveal Gap) ÷ 2 | Opening Height + Top Overlay + Bottom Overlay |
| Single Inset Door | Opening Width – (2 × Perimeter Gap) | Opening Height – (2 × Perimeter Gap) |
| Double Inset Doors | (Opening Width – 3 Vertical Gaps [Left, Center, Right]) ÷ 2 | Opening Height – (2 × Perimeter Gap) |
5-Piece Shaker & Slab Component Cut List
This output lists exact cut dimensions per door and for the full project across all frame, panel, and slab components. Center panel deductions allow for seasonal humidity changes so wood movement never cracks the frame joints.
| Component Type | Exact Cut Dimension Formula & Allowance |
|---|---|
| Stiles (Vertical Frame) | Matches exact Finished Door Height. |
| Rails (Horizontal Frame) | Finished Door Width – (2 × Stile Width) + (2 × 3/8″ Tongue Depth, adding 3/4″ total). |
| Wood Center Panels | Door Width/Height – (2 × Stile/Rail Width) + (2 × Tongue Depth) – (2 × 1/16″ Expansion Allowance). |
| Glass Insert Panels | Substitutes rear rabbet depth for the tongue and outputs Total Linear Feet of Vinyl Glass Retainer Bead. |
| 1-Piece Slab Doors | Outputs Net Core Slab Cut Width and Height (deducting 2 × edge banding thickness) plus Total Linear Feet of Edge Banding (with a 10.0% waste buffer). |
Concealed Hinge & Hardware Drilling Specs
This breakdown provides your Hinges Required per Door, Total Hinge Pairs, and exact 35mm Forstner bit coordinates. Heavy 3/4″ solid wood raised panels or 1/4″ tempered glass inserts over 30″ tall automatically add +1 hinge per door.
- Hinge Quantity Scaling: Scales automatically from 2 hinges (doors up to 36″) up to 5 hinges (doors over 80″).
- Hinge Cup Bore Distance: Adds the 17.5mm (11/16″) Forstner bit radius to your tab margin K from the door edge.
- Cup Drilling Depth & Layout: Includes a mandatory 1/2″ (13mm) cup drilling depth warning and the Vertical Hinge Centerline Layout from the top edge.
- Required Hinge Mounting Plate Height: Displays fractional overlay ratings for Compact hinges or 0mm, 3mm, 6mm, and 9mm plates for Straight-Arm 14mm Euro hinges.
Material & Retail Shopping List (With Waste Applied)
This summary converts finished part dimensions into retail hardware store units with your material waste percentage applied.
- Total Hardwood Lumber Required in Board Feet (BF): Calculates stile and rail parts using nominal 4/4 rough lumber thickness (1.0″), divided by 144, plus waste.
- Sheet Goods (4×8 Sheets): Converts center panels or slabs into square footage, adds waste, and rounds up to whole 4×8 sheets (32.0 sq. ft. each).
- Glass & Hardware Totals: Outputs Total Glass Inserts Required (sq. ft.) and Total Knobs/Pulls Required.
Total Project Cost Breakdown
This estimate itemizes your Raw Lumber / Sheet / Custom Door Material Cost, Hinge & Pull Hardware Cost, and Finish Carpenter Installation & Drilling Labor Cost. It sums your Base Project Subtotal, adds the Unforeseen Contingency Buffer Amount ($), and outputs the Exact Total Project Cost and Average Cost Per Door.
| Installation & Surface Condition | Labor Difficulty Multiplier |
|---|---|
| Standard Wood / Undrilled Doors | 1.0× base labor rate |
| Two-Hole Pull Leveling or Glass Handling | 1.15× base labor rate |
| Precision Inset Door Fitting | 1.25× base labor rate |
CONTRACTOR QUICK CHECKLIST: PRE-CUT VERIFICATION
• Three-Point Opening Check: Measure cabinet opening width and height at the top, middle, and bottom before locking in your cut list.
• Squareness Verification: Check for out-of-square face frames, as uneven boxes directly impact final overlay and inset reveal gaps.
• Forstner Bit Depth Stop: Set your drill press stop to the mandatory 1/2″ (13mm) cup depth so you never blow through the door face.
Tools & Materials Needed
Measuring, Sawing & Milling Tools
Use these layout and cutting tools to dimension stiles, rails, and sheet goods to exact 1/16″ tolerances.
• Measuring Tools: 16-foot or 25-foot fractional steel tape measure (graduated in 1/16″ increments) and a digital machinist caliper.
• 10-Inch Table Saw: Equipped with a 50-tooth combination rip/crosscut blade and flat-top grind (FTG) rip blade.
• 12-Inch Sliding Compound Miter Saw: Fitted with an 80-tooth ultra-fine crosscut blade.
• Variable-Speed Router Table: Minimum 2-1/4 HP router with a matched 2-bit cope-and-stick Shaker router bit set (3/8″ tongue depth).
Routing, Boring & Assembly Tools
Keep these specialized bits, drilling jigs, and clamps on hand for hardware boring and flat frame glue-ups.
• Specialty Router Bits & Edge Iron: 3/8-inch ball-bearing rabbeting bit (for rear glass openings), edge banding iron, and flush-trim laminate bit.
• 35mm Hinge Boring Setup: Drill press or concealed hinge boring jig fitted with a carbide-tipped 35mm Forstner bit and depth stop collar.
• Hardware Drilling Jigs: Self-centering Vix bit (#6 or #8) and a cabinet hardware template jig with adjustable 3″ to 6-5/16″ center-to-center guides.
• Assembly Clamps: Parallel-jaw cabinet clamps (24-inch and 36-inch capacity).
Lumber, Sheet Goods & Glazing Materials
Compare the required lumber, sheet stock, and panel glazing specifications by door component below.
| Door Component | Material Specification & Dimensions |
|---|---|
| Stile & Rail Frame Stock | Kiln-dried 4/4 hardwood lumber (Hard Maple, Paint-Grade Poplar, Red Oak, or White Oak surfaced S2S to 13/16″ and planed to 3/4″ final thickness). |
| Recessed Shaker Center Panels | 4×8 sheets of 1/4″ MDF core or A-1 grade 1/4″ birch/maple veneer plywood. |
| 1-Piece Slab Door Cores | 4×8 sheets of 3/4″ cabinet-grade plywood or ultralight MDF. |
| Slab Edge Banding | Pre-glued wood veneer edge banding tape (1/32″ thick × 7/8″ wide) or 1/8″ solid wood lipping strips. |
| Glass-Insert Door Glazing | 1/4-inch custom-cut tempered glass panes, flexible vinyl glass retainer bead, and 100% clear neutral-cure glazing silicone. |
| Joinery & Panel Spacing | 260° compressible rubber panel spacer balls (1/4″ diameter Space Balls for 3/8″ frame grooves) and PVA Type II water-resistant wood glue (Titebond II). |
Concealed Hinges, Fasteners & Bumpers
Select the matching 35mm hinges, mounting plates, screws, and door stops for your cabinet style.
• Face-Frame Concealed Hinges: 35mm soft-close Blum Compact 38N/39C hinges.
• Frameless Euro Concealed Hinges: Blum Clip Top Blumotion 110° straight-arm Euro hinges with 0mm, 3mm, 6mm, or 9mm mounting plates.
• Mounting & Hardware Screws: #6 × 5/8″ flat-head Phillips wood screws (for hinge cups) and 8-32 × 1″ truss-head machine screws (for pulls and knobs).
• Bumpers & Inset Catches: 3/32-inch clear self-adhesive silicone sound bumpers and mechanical magnetic catches (for non-self-closing inset doors).
CONTRACTOR QUICK CHECKLIST: SHOP SETUP & PREP
• Verify Lumber Thickness: Plane 13/16″ S2S hardwood down to an exact 3/4″ final thickness before setting up your cope-and-stick router bits.
• Center Floating Panels: Drop 1/4″ Space Balls into the 3/8″ frame grooves during glue-up to prevent panel rattles and joint cracks.
• Pre-Drill Hinge Pilot Holes: Use a #6 or #8 self-centering Vix bit so #6 × 5/8″ screws seat dead-center without shifting the hinge cup.
Always check local building codes and HOA guidelines before starting.
How do you measure cabinet hinge overlay?
To measure cabinet hinge overlay on an existing cabinet, close the door and stick a piece of masking tape on the cabinet face frame flush against the hinge-side edge of the door. Open the door and measure the distance from the inside edge of the cabinet opening to the edge of the tape. Alternatively, subtract the cabinet opening width from the finished door width and divide by two for a single door with equal overlays.
Once you verify your target overlay distance, enter your cabinet box dimensions into the calculator above to generate your exact cut list, hinge cup boring coordinates, and replacement cost estimate.
Cabinet Door Size Project Overview
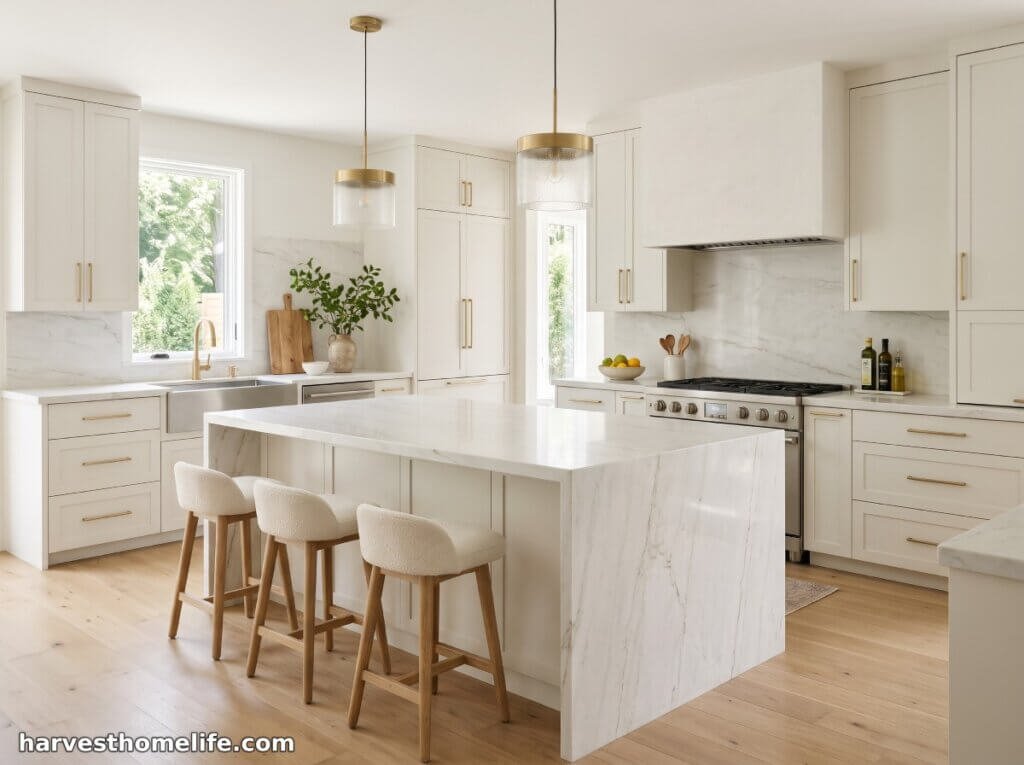
Using a dedicated cabinet door size calculator prevents expensive miscuts when building custom 5-piece Shaker frames or ordering pre-made replacement doors.
The Hybrid Measurement System in American Finish Carpentry
In American finish carpentry, a unique hybrid measurement system governs cabinetmaking across shop layout, hardware boring, and material purchasing:
| Cabinetmaking Stage | Measurement Unit | Shop Application |
|---|---|---|
| Box Openings, Overlays & Joinery Cuts | 1/16″ tape measure fractions | Sizing exterior doors, stiles, rails, and center panels. |
| European Concealed Hinges | Millimeters (mm) | Engineering and boring 35mm cups and 0mm to 9mm mounting plates. |
| Raw Material Purchasing | Decimal board feet (BF) & whole 4×8 sheets | Ordering rough hardwood lumber and sheet goods. |
A single 1/8″ math error when accounting for cope-and-stick router tongues, solid wood edge banding, or paired butt-door center reveals will leave your doors binding against adjacent appliances or failing to cover the cabinet face frame.
Matching Hardware Specs to Wood Geometry
You can use this tool as a cabinet door overlay calculator to convert partial-overlay face frames into full-overlay modern cabinetry. It also functions as a cabinet door replacement cost calculator to compare DIY hardwood milling against factory-built doors.
In both workflows, precision relies on matching the physical hardware to the wood geometry. Below, we break down the exact shop formulas for asymmetric four-side overlays, seasonal wood movement allowances, 35mm Forstner bit edge setbacks, and contractor labor multipliers.
CONTRACTOR QUICK CHECKLIST: CRITICAL TOLERANCES
• Joinery & Edge Banding: Account for cope-and-stick router tongues and solid wood edge banding before cutting core parts.
• Center Reveal Clearance: Deduct the 1/8″ center reveal on paired butt doors so edges never bind against appliances.
• Metric-to-Fractional Sync: Match 35mm cup bore setbacks and 0mm–9mm mounting plates to your exact 1/16″ door overlay.
Step-by-Step Formulas: How to Calculate Cabinet Door Dimensions
Calculating exact exterior door dimensions, internal Shaker frame parts, hardware boring coordinates, and material costs requires following a strict mathematical sequence from the cabinet opening outward.
How Do You Calculate Overlay, Inset, and 5-Piece Shaker Cut List Dimensions?
Never measure old, warped cabinet doors to size replacements; always measure the inside width (Wo) and height (Ho) of the rigid cabinet box opening to the nearest 1/16″. Standard calculators force a single uniform overlay on all four sides, which fails on end-run cabinets butting against a drywall return or refrigerator panel where you need a 1/4″ overlay on the wall side and a 1-1/4″ overlay on the exposed stile.
By separating Left (OL), Right (OR), Top (OT), and Bottom (OB) overlays and defining a Center Reveal / Perimeter Inset Gap (Gc, standard 1/8″), the sizing formulas adapt to both Face Frame and Frameless (Euro) boxes:
| Application & Door Configuration | Finished Door Width (Wd) Formula | Finished Door Height (Hd) Formula | Standard Gap / Overlay Notes |
|---|---|---|---|
| Overlay — Single Door | Wd = Wo + OL + OR | Hd = Ho + OT + OB | Default 1/2″ overlay per side adds 1″ total to Wo and Ho. |
| Overlay — Double (Butt) Doors | Wd = (Wo + OL + OR – Gc) / 2 | Hd = Ho + OT + OB | Splits combined width in half and deducts 1/16″ per door (half of the 1/8″ center reveal Gc). |
| Inset — Single Door | Wd = Wo – (2 × Gc) | Hd = Ho – (2 × Gc) | Deducts 1/8″ perimeter gap on all four sides (1/4″ total deduction from Wo and Ho). |
| Inset — Double (Butt) Doors | Wd = (Wo – (3 × Gc)) / 2 | Hd = Ho – (2 × Gc) | Deducts 3 vertical gaps (left, center, right = 3/8″ total) and divides remaining width by 2. |
On Frameless (Euro) cabinets constructed from 3/4″ melamine or plywood box sides, “full overlay” typically uses a 5/8″ or 11/16″ overlay on each outer edge. This leaves a 1/8″ or 1/16″ reveal at the cabinet box perimeter so adjacent doors do not rub when opened.
If you are fitting inset doors, mount a physical stop block or magnetic catch set back 3/4″ plus a 3/32″ silicone bumper allowance behind the upper frame opening. This stops the door flush with the face frame rather than swinging into the cabinet interior.
1-Piece Slab & 5-Piece Shaker Internal Cut Formulas
Once your exterior door width and height are locked in, your internal cut list depends on the build mode. For a 1-Piece Slab Door, applying 1/32″ pre-glued veneer tape or 1/8″ solid wood lipping after cutting the core sheet to finished size makes the door oversize by twice the banding thickness and ruins your reveal gaps.
For a 5-Piece Shaker Door built with standard 2-1/4″ stiles and rails, cutting the horizontal rails strictly to the visible opening between the stiles leaves you 3/4″ short. A matched cope-and-stick router bit set mills a 3/8″ deep groove down the inside edges of the stiles and rails, plus a mating 3/8″ tongue on both rail ends, requiring you to add two tongue depths (3/4″ total) to the visible rail span.
| Door Component | Exact Shop Cut Formula | Allowance & Material Rule |
|---|---|---|
| 1-Piece Slab Core Width & Height | Finished Width or Height – (2 × Edge Banding Thickness) | Deducts twice the 1/32″ veneer tape or 1/8″ solid wood lipping thickness. |
| Edge Banding Linear Footage | ((2 × (Door Width + Door Height) × Total Doors) ÷ 12) × 1.10 | Includes a 10% linear footage waste buffer. |
| Shaker Vertical Stiles | Matches exact Finished Door Height | Cut to full exterior height with a 3/8″ inside groove. |
| Shaker Horizontal Rails | Finished Door Width – (2 × Stile Width) + (2 × 3/8″ Tongue Depth) | Adds 3/4″ total for the mating 3/8″ cope-and-stick tongues. |
| Floating Center Panel Width | Door Width – (2 × Stile Width) + (2 × 3/8″ Tongue Depth) – (2 × 1/16″ Expansion) | Deducts 1/8″ total width so seasonal swelling never cracks frame joints. |
| Floating Center Panel Height | Door Height – (2 × Rail Width) + (2 × 3/8″ Tongue Depth) – (2 × 1/16″ Expansion) | Deducts 1/8″ total height and pairs with 1/4″ rubber Space Balls. |
| Vinyl Glass Retainer Bead | ((2 × (Panel Width + Panel Height) × Total Doors) ÷ 12) × 1.10 | Secures 1/4″ tempered glass inside a 3/8″ rear rabbet with 10% waste. |
Seasonal Wood Movement & Tempered Glass Rabbet Rules
The floating center panel nests inside those 3/8″ grooves, but cutting a 3/4″ solid wood raised panel tight to the groove bottoms causes summer humidity swelling that pops glued rail-to-stile joints apart. Deduct a 1/16″ expansion allowance per side (1/8″ total in width and height) and insert 1/4″ rubber Space Balls into the grooves to center the panel and absorb wood movement.
Never glue a 5-piece wood frame around a 1/4″ tempered glass insert; if the glass breaks or the wood shifts, the pane will shatter or require destroying the frame to replace. Instead, follow this four-step rear rabbet glazing method:
- Glue the Open Frame: Assemble the 5-piece Shaker frame without milling an internal panel groove.
- Mill the Rear Rabbet: Rout a 3/8″ open rabbet around the back interior perimeter of the assembled frame.
- Deduct Glazing Clearance: Deduct a 1/16″ clearance per edge from the glass cut size for glazing silicone.
- Install Retainer Bead: Secure the 1/4″ tempered glass pane using removable vinyl glass retainer bead.
CONTRACTOR QUICK CHECKLIST: JOINERY & GLAZING CLEARANCES
• Inset Door Stop Setback: Mount inset stops 3/4″ back plus a 3/32″ silicone bumper allowance so doors close flush.
• Shaker Rail Tongue Math: Add 3/4″ total (two 3/8″ tongues) to the visible opening between vertical stiles.
• Floating Panel Expansion: Deduct 1/8″ total width and height and drop 1/4″ Space Balls into the 3/8″ grooves.
How Do You Calculate Concealed Hinge Counts, 35mm Cup Bore Distance, and Mounting Plates?
Concealed European and Compact hinges require bridging the gap between fractional inch door layouts and metric hardware tolerances. First, determine the required hinge count (Hcount) per door based on height and panel weight. Doors up to 36″ tall use 2 hinges; 36″ to 60″ doors require 3 hinges; 60″ to 80″ pantry doors take 4 hinges; and doors over 80″ demand 5 hinges.
If you select a heavy 3/4″ solid wood raised panel or 1/4″ tempered glass insert on any door over 30″ tall, add +1 hinge per door (up to 5 maximum) to prevent hinge sag. With top and bottom hinges offset Oedge (standard 3-1/2″) from the top and bottom ends, any intermediate hinge i is spaced equidistantly from the top edge using Yi = Oedge + (i – 1) × ((Hd – (2 × Oedge)) / (Hcount – 1)).
When boring the 35mm (1-3/8″) hinge cup to a strict 1/2″ (13mm) depth—shallow enough to avoid blowing through a 3/4″ door face—you must set your drill press fence to the exact centerpoint bore distance (Cbore). Add the radius of the 35mm Forstner bit (17.5mm or 11/16″) to your desired edge bore margin or “tab” distance K (typically 3/16″):
| Bore Margin / Tab (K) | Edge-to-Center Bore Distance (Fractional Inches) | Edge-to-Center Bore Distance (Millimeters) | Euro Plate Height (Ph) for 1/2″ (12.7mm) Overlay | Euro Plate Height (Ph) for 5/8″ (15.9mm) Overlay |
|---|---|---|---|---|
| 1/8″ (3.2mm) | 13/16″ | 20.7mm | 3mm Plate (4.5mm exact) | 0mm Plate (1.3mm exact) |
| 3/16″ (4.8mm) — Standard | 7/8″ | 22.3mm | 6mm Plate (6.1mm exact) | 3mm Plate (2.9mm exact) |
| 1/4″ (6.4mm) | 15/16″ | 23.9mm | 6mm or 9mm Plate (7.7mm exact) | 3mm or 6mm Plate (4.5mm exact) |
For Long-Arm Euro hinges using a standard Straight-Arm (14mm base constant), the calculator determines the required mounting plate thickness in millimeters via Ph = 14 + (K × 25.4) – (Ohinge-side × 25.4) and rounds to the nearest stocked plate (0mm, 3mm, 6mm, or 9mm). If your target overlay is very small or inset (causing Ph to exceed 9mm), the logic alerts you to switch to a Half-Cranked (9.5mm) or Full-Cranked Inset hinge arm.
How Are Retail Lumber Yields, Custom Door Fees, and Contractor Labor Costs Calculated?
To produce an accurate retail shopping list and budget, the calculator converts finished dimensions into raw stock units before applying cost formulas. Even though finished Shaker stiles and rails are planed to 3/4″ thick, hardwood lumber yards price and sell rough stock in nominal 4/4 thickness (1.0″).
The tool computes board footage per door as ((2 × Ls × Ws × 1.0) + (2 × Lr × Wr × 1.0)) / 144, multiplies by total doors (Ndoors), and adds a 15.0% waste factor to cover saw kerf and knots. Sheet goods for 1/4″ center panels or 3/4″ slab doors are divided by 144 to find square footage, increased by a 10.0% waste factor, and divided by 32.0 sq. ft. (rounded up to the next whole integer) to tell you exactly how many 4×8 sheets to buy.
| Project Cost Category | DIY 5-Piece Shaker / Slab Build | Pre-Made Custom Door Order | Difficulty / Pricing Benchmark |
|---|---|---|---|
| Base Material Cost (Cmat) | (Total BF × PriceBF) + (4×8 Sheets × Pricesheet) | Total Door Sq. Ft. × Pricecustom_sqft | Hardwood: $4.50–$11.00/BF; Custom Unfinished: $22.00–$45.00/sq. ft. |
| Glass & Milling Upcharges | Panel Sq. Ft. × Priceglass_sqft | Ndoors × (Glass Frame Fee + Pre-Bore Fee) | Mullion/Glass Routing: $15.00–$35.00/door; 35mm Pre-Bore: $3.00–$6.00/door. |
| Hardware Cost (Chard) | (Phinges × Pricepair) + (Ndoors × Pricepull) | (Phinges × Pricepair) + (Ndoors × Pricepull) | Soft-close hinges: $6.00–$14.00/pair; Pulls/Knobs: $3.50–$15.00/piece. |
| Installation Labor (Clabor) | $0.00 (Self-Installed) or Contractor Rate | Ndoors × Labor Rate × Mlabor | Mlabor = 1.0 (Standard), 1.15 (2-Hole Pulls/Glass), 1.25 (Inset Fitting). |
After summing Material Cost (Cmat), Hardware Cost (Chard), and difficulty-adjusted Labor Cost (Clabor) into the Base Project Subtotal (Csub), the calculator applies your Unforeseen Contingency Buffer (default 10.0%) to absorb warped boards, extra finishing sandpaper, or stripped hinge screws, yielding your Exact Total Project Cost and Average Cost Per Door.
Frequently Asked Questions
Q. How do you measure cabinet doors for replacement?
A. Measure the inside width and height of the cabinet box opening to the nearest 1/16″, not the old warped doors. For standard overlay doors, add twice your desired overlay (typically 1/2″ per side, adding 1″ total) to both the opening width and height. For double butt doors sharing a single opening, add the left and right overlays to the opening width, subtract a 1/8″ center reveal gap, and divide by two.
Q. How much do custom cabinet doors cost?
A. Unfinished custom wood Shaker cabinet doors typically cost between $22 and $45 per square foot ($35 to $90 per average door), while pre-finished or painted custom doors range from $40 to $85 per square foot ($70 to $170+ per door). Adding mullion frames or glass-ready routing generally adds a $15 to $35 upcharge per door, plus $3 to $6 per door for factory 35mm hinge cup pre-boring.
Q. How much does a finish carpenter or cabinet refacing specialist charge per door for cabinet door replacement?
A. A professional finish carpenter or cabinet refacing specialist typically charges $45 to $95 per door for labor alone to bore hinges, hang the doors, and align reveals. Complex installations carry a labor premium of 15% to 25% more per door—specifically when leveling two-hole pulls, installing tempered glass inserts, or fitting precision inset doors that require an exact 1/8″ perimeter gap.
Planning your next project? Browse our master hub of Free DIY Home & Garden Calculators to get instant material lists, spacing math, and budget estimates.