Quick Answer
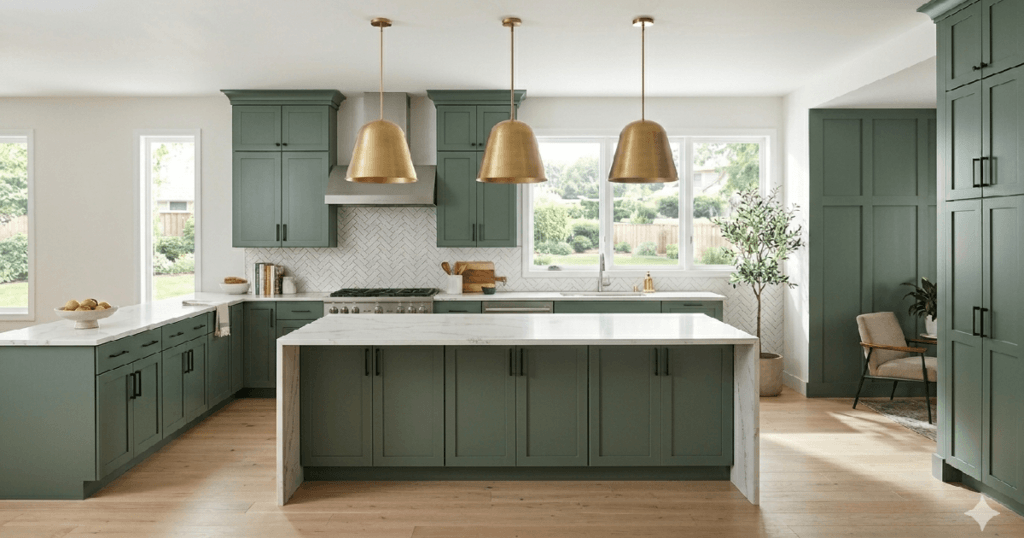
You don’t need to pay a general contractor a premium for high-impact cosmetic upgrades. By mastering core finishing techniques—like professional-grade paint application, precision trim carpentry, and proper surface prep—you can achieve luxury architectural results for a fraction of the cost.
Welcome to the Interior DIY & Upgrades Hub
Here, we replace viral internet hacks with objective, architectural-grade methodology. Every guide, project, and material recommendation in this hub is rigorously tested to ensure your sweat equity actually builds tangible home equity, rather than destroying it.
Our Workshop Philosophy: Prep Endlessly, Finish Flawlessly
We believe the only difference between a “cheap DIY look” and a “custom builder finish” is the unglamorous prep work. We focus heavily on structural integrity, correct material science (like knowing exactly when to use MDF versus solid wood), and professional finishing schedules so your interior upgrades look flawless and last a lifetime.
According to Remodeling Magazine’s annual Cost vs. Value report, minor interior upgrades like cabinet refacing and modernizing trim yield a significantly higher return on investment (often recovering over 85% of their cost) compared to massive, tear-down structural remodels.
However, that high ROI completely evaporates if the execution is amateur.
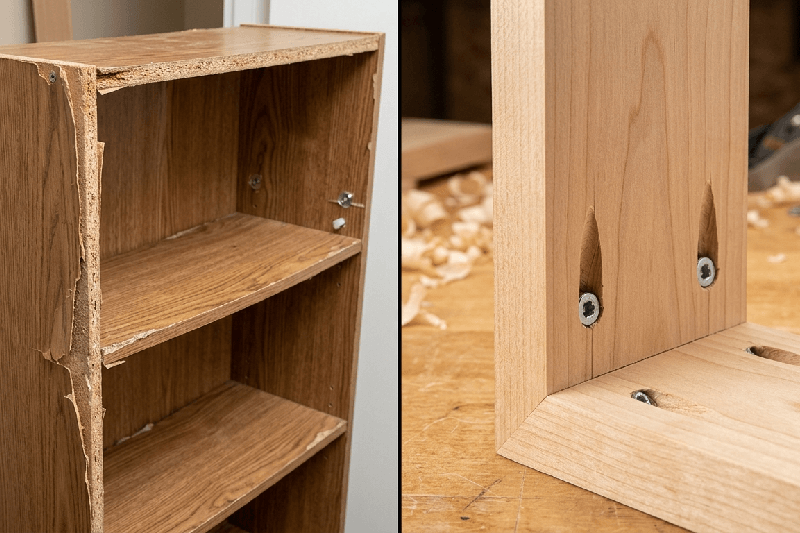
Our workshop focuses entirely on “masstige” (mass-prestige) execution. This means we do not rely on trending “peel and stick” wallpapers or fragile aesthetic hacks that will inevitably end up in a landfill in two years. Instead, we analyze the exact durability of urethane alkyd cabinet paint formulations, calculate flawless board-and-batten math using architectural standards, and prioritize structurally sound, pocket-hole joinery over cheap cam-lock fasteners.
Stop throwing away your hard-earned money on decorative band-aids. We are here to help you execute permanent, high-end interior finishes on a weekend warrior budget, utilizing professional techniques, proper curing times, and data-backed material selections.
Contractor vs. DIY Cost Breakdown (2026 Averages)
| Interior Project | Average Contractor Quote | DIY Material Cost | Total Money Saved |
|---|---|---|---|
| Paint Kitchen Cabinets (Urethane) | $3,500 – $5,000 | $250 – $400 | Over $3,000 |
| 12ft Board & Batten Accent Wall | $800 – $1,200 | $150 – $200 | Over $650 |
| Replace Bathroom Vanity & Faucet | $900 – $1,500 | $400 – $600 | Over $500 |
DIY Savings Calculator
Select a project to see 2026 average costs, or enter your own quote to calculate your exact savings.
💡 How to Calculate Your Savings
1. Select Your Project: Choose the interior upgrade you are planning from the drop-down menu. We will automatically load the 2026 national averages for both contractor quotes and DIY materials.
2. Customize Your Costs (Optional): Got a real quote from a local contractor? Found a great deal on supplies? Delete our averages and type your exact numbers directly into the boxes!
3. See Your Savings: Click the Calculate Total Savings button to see exactly how much money you keep in your pocket by picking up the tools yourself.
Pro-Tip: Tired of guessing which materials to buy and wasting money on warped lumber? Grab our free Ultimate Workshop Blueprint Pack by joining our newsletter below. You will receive exact cut-lists, tool requirements, and our exclusive “Contractor Rip-Off Guide” delivered straight to your inbox so you never overpay for building materials again.
High-End Interior Upgrades by Room
1. High-ROI Kitchen Upgrades
The kitchen is the most expensive room to renovate, but it also yields the highest return on investment. We break down how to modernize your space through professional cabinet refinishing, hardware alignment, and custom pantry builds without having to touch plumbing or electrical behind the walls.
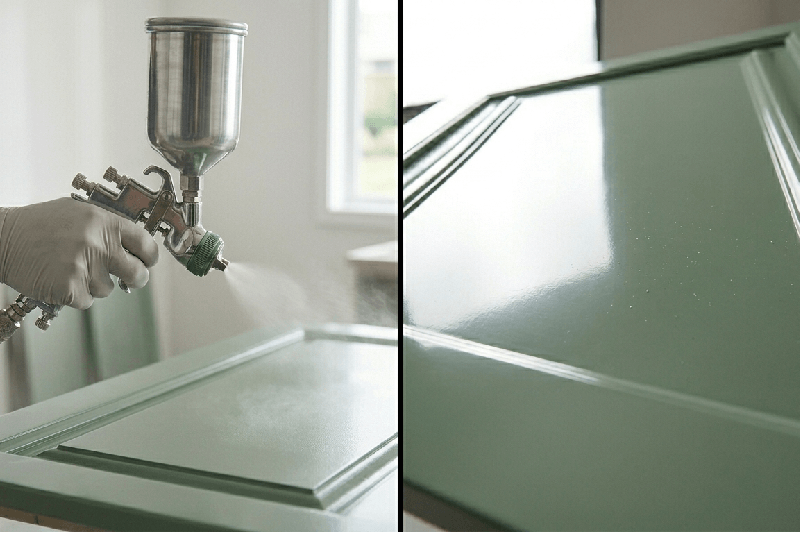
Beyond just painting cabinets, we explore how to seamlessly integrate architectural details like custom wood range hoods, heavy-duty floating shelving, and premium under-cabinet lighting. By focusing on high-grade materials and exact installation techniques, you can completely redefine the heart of your home without the chaos or price tag of a full gut-rehab.
Cabinet Paint Formulation Breakdown
| Paint Formulation | Durability & Finish | Cure Time to Hardness | Best Application Method |
|---|---|---|---|
| Standard Interior Latex | Very Low (Prone to chipping and peeling) | Never fully hardens (remains rubbery) | Walls only (Do not use on cabinets) |
| 100% Acrylic Enamel | Medium-High (Good leveling, decent wear) | 14 to 21 Days | High-density foam roller or brush |
| Urethane Alkyd Enamel | Extreme (Factory-like, impact-resistant shell) | 21 to 30 Days | HVLP Paint Sprayer |
Beyond paint science, our kitchen guides cover the exact methodologies for achieving perfectly aligned hardware and upgrading functional storage:
- Cabinet Painting Protocols: Step-by-step guides on chemical deglossing (TSP alternatives), applying high-adhesion bonding primers, and spraying leveling enamels that absolutely will not chip.
- Hardware & Fixtures: How to utilize precision cabinet hardware jigs to ensure every single handle is perfectly level, preventing the compounding errors that ruin the look of a kitchen.
- Functional Storage Mechanics: Engineering custom pull-out pantry drawers using heavy-duty, full-extension ball-bearing slides that can support up to 100 pounds of canned goods without sagging.
Ready to Start Your Kitchen Transformation?
If you are ready to dive straight into the practical application of these methods, we have built a comprehensive breakdown covering the specific tools, techniques, and mindset needed for a flawless cosmetic upgrade.
Learn how to execute these upgrades in our dedicated kitchen hub: 👉 DIY Kitchen Remodel Ideas: Stop Overpaying Pros
2. Bathroom Functional Finishes
Skip the $15,000 demolition. Discover how to upgrade existing vanities, install moisture-resistant board and batten wainscoting, and apply high-grade enamel to dated surfaces for a clean, modern aesthetic that withstands heavy humidity.
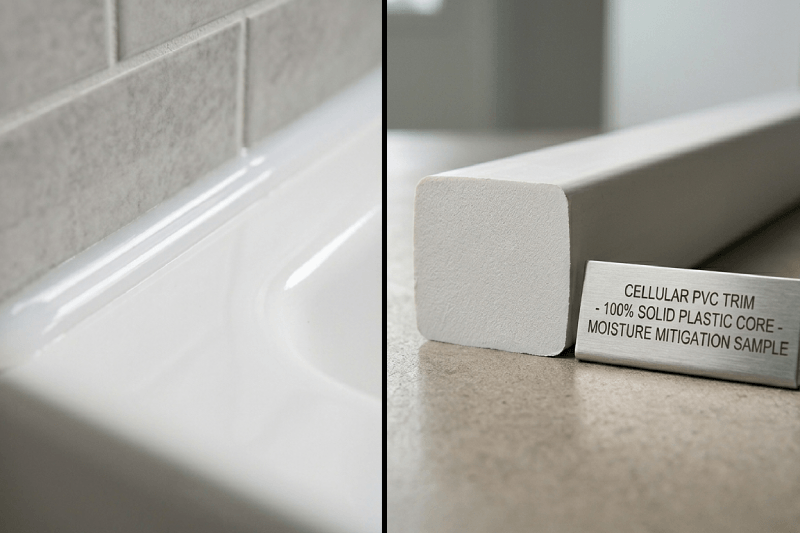
We also cover the critical finishing touches that elevate a standard builder-grade bathroom into a spa-like retreat. From framing out raw contractor mirrors with custom millwork to properly sealing painted tile and upgrading hardware, these accessible weekend projects deliver massive visual impact while strictly adhering to moisture-control best practices. According to the EPA guidelines on indoor moisture, controlling water intrusion is the only verifiable way to prevent toxic mold growth. Therefore, any wet-zone transition must be sealed with 100% pure silicone, which remains permanently flexible and entirely waterproof.
Baseboard Material Viability in Bathrooms
| Material Type | Moisture Resistance | Swelling Risk | Ideal Installation Zone |
|---|---|---|---|
| Standard Unprimed MDF | Zero (Acts like a sponge) | Critical Failure upon water contact | Bedrooms & Living Rooms Only |
| Solid Pine Wood | Moderate (Requires heavy sealing) | Low (May warp over time) | Half-Baths & Hallways |
| Cellular PVC Trim | 100% Waterproof | Zero (Completely inert) | Full Bathrooms & Shower Perimeters |
Our bathroom guides provide exact specifications for ensuring your space remains hygienic and structurally sound:
- Sealant & Caulking Data: Testing the exact degradation rates of pure silicone versus siliconized acrylic in high-heat, high-moisture wet zones.
- Heavy Vanity & Mirror Installations: Finding true load-bearing anchor points. We teach you how to properly map framing and safely mount 50-pound fixtures directly to studs, rather than relying on weak drywall anchors.
- Moisture-Proof Trim: Step-by-step protocols for cutting, coping, and installing Cellular PVC baseboards that will easily survive direct water exposure and daily mop impacts.
🛠️ Ready for the Full Transformation? Board and batten is the ultimate weekend upgrade, but it’s just the beginning. If you want to overhaul your entire bathroom on a budget—without tearing down walls or moving plumbing—read our step-by-step guide: DIY Bathroom Remodel: The Ultimate No-Demo Makeover.
3. Living Space Woodworking & Millwork
Custom millwork is the secret to elevating a basic drywall box into luxury architecture. Learn our step-by-step methods for cutting flawless crown molding, designing built-in living room bookshelves, and constructing custom fireplace mantels.
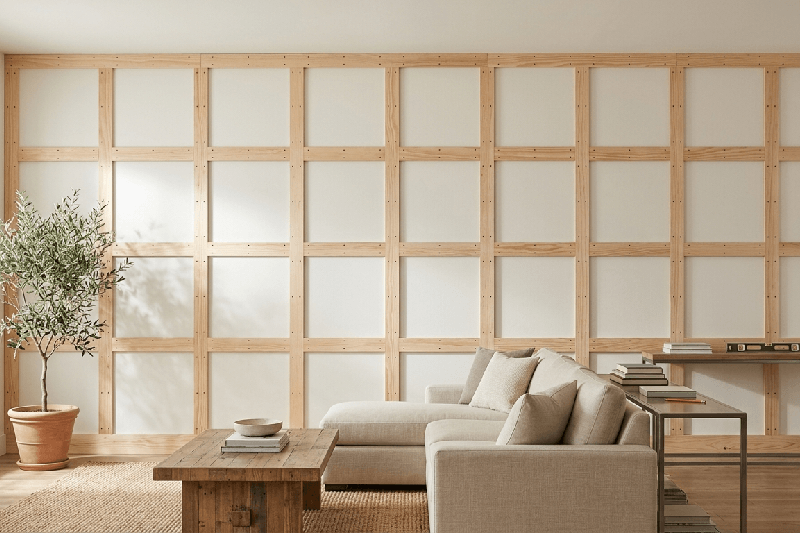
Whether you are looking to install floor-to-ceiling traditional wainscoting, upgrade to oversized heritage baseboards, or build a bespoke media console, precision is everything. We provide the exact cut lists, joinery techniques, and finishing schedules needed to ensure your living spaces radiate timeless, professional craftsmanship. Furthermore, we rely on the International Residential Code (IRC) standard of 16-inch on-center stud spacing to ensure our heavy trim pieces are mechanically fastened to the framing, not just glued to the drywall paper.
Trim Fastener & Gauge Selection Guide
| Nail Gauge | Thickness/Size | Best Application | Splitting Risk |
|---|---|---|---|
| 15-Gauge / 16-Gauge | Thickest (Finish Nails) | Hanging heavy doors, installing thick baseboards | High (Will split thin trim) |
| 18-Gauge | Medium (Brad Nails) | Standard baseboards, casing, board-and-batten | Low |
| 23-Gauge | Thinnest (Pin Nails) | Attaching delicate moldings, holding glued joints | Zero (But has no structural holding power) |
Inside our woodworking section, you will find heavily detailed blueprints for:
- Accent Walls & Wainscoting: The exact mathematical formulas and spacer-block techniques for perfectly spaced board-and-batten, traditional shiplap, and complex geometric wall treatments.
- Custom Built-Ins: How to elevate budget-friendly, unfinished stock cabinets from big-box stores by building custom bases, trimming the seams, and turning them into seamless, floor-to-ceiling library walls.
- Pocket-Hole Furniture Construction: Blueprints for sturdy, solid wood entryway tables and media consoles. We teach you how to master the pocket-hole jig to create hidden, incredibly strong mechanical joints without needing complex traditional woodworking skills like mortise and tenons.
Essential Tools for Interior Upgrades
A major barrier to entry for many weekend warriors is the false belief that they need to empty their wallet on professional-grade tools to get started. Save your money on massive, stationary shop equipment like cabinet saws or commercial planers. You can execute 90% of the projects detailed in this hub by investing smartly in highly mobile, mid-tier essentials.
Pneumatic vs. Cordless Tool Viability
| Tool Platform | Upfront Cost | Mobility | Best For… |
|---|---|---|---|
| Pneumatic (Air Compressor) | Low (Tools are cheap, compressor is cheap) | Poor (Tethered to a noisy hose) | Stationary workshop builds, extreme budget DIYers |
| 18V / 20V Cordless (Battery) | High (Batteries are expensive) | Excellent (Work anywhere in the house) | Room-to-room interior upgrades, convenience |
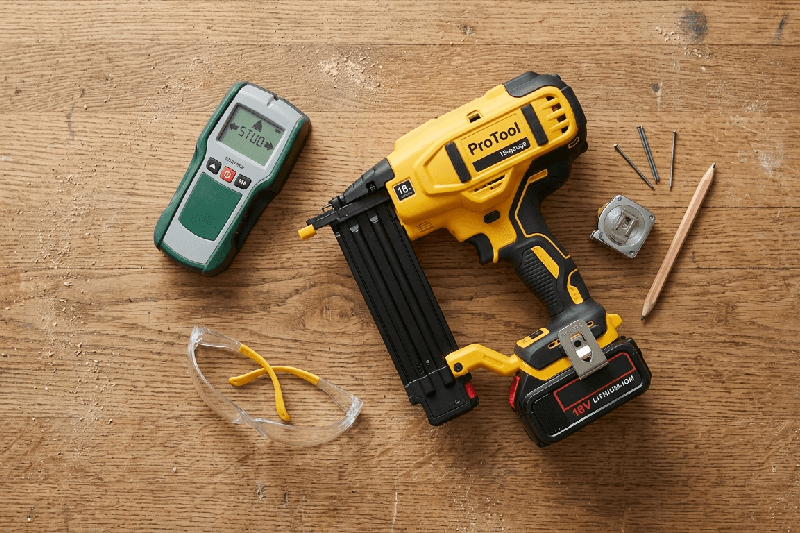
The foundation of your interior upgrade kit should start with a reliable, deep-scanning stud finder to ensure safe anchoring. Next, an 18-gauge brad nailer (either pneumatic with a small compressor or a modern battery-operated model) is absolutely non-negotiable for attaching trim seamlessly without splitting the wood.
Combine these with a self-leveling cross-line laser level for establishing perfect horizontal baselines, and a basic pocket-hole jig for custom furniture builds. We strictly test, review, and recommend these mid-tier tools because they deliver pro-grade, mathematically accurate results without carrying the absurd pro-grade price tag.
FAQ
What is the most profitable interior DIY upgrade?
Kitchen and bathroom upgrades consistently offer the highest return on investment. Tasks like properly repainting builder-grade cabinets, upgrading drawer hardware, and installing modern trim can drastically increase your property value without hefty contractor markups.
Do I need expensive power tools for interior trim work?
No. You can complete professional-looking trim work, board-and-batten, and baseboard installations with just an 18-gauge brad nailer, a reliable miter saw, and a laser level. Mid-tier tools are more than sufficient for weekend warrior projects.
Can I paint my own kitchen cabinets without them peeling?
Yes, but preparation is the key. You must thoroughly degrease the wood, lightly sand the surfaces, use a high-adhesion bonding primer, and finish with a self-leveling cabinet enamel. Skipping any of these prep steps will result in peeling paint.
How do I safely hang heavy interior fixtures?
Never rely on standard drywall anchors for heavy mirrors, floating shelves, or upper cabinets. You must use a high-quality stud finder to locate the wooden framing behind your drywall and secure your fixtures directly into the studs using structural screws.
What is the difference between MDF and solid pine for interior trim?
MDF (Medium Density Fiberboard) is cheaper, comes pre-primed, and has no knots, making it excellent for painted accent walls in dry areas. Solid pine is more durable and handles moisture better, making it superior for high-traffic zones or bathrooms.
Safety Disclaimer: DIY projects involve the use of power tools, chemical solvents, and materials that can cause severe injury. Always wear proper PPE (Personal Protective Equipment) including ANSI-rated safety glasses and respirators when painting or sanding. Always read manufacturer safety manuals, verify load-bearing capacities, and consult local building codes before modifying your home’s framing, plumbing, or electrical structure.

The Harvest Home Life Team is a collective of hands-on researchers and material evaluators dedicated to data-driven home improvement. Operating out of our active testing workshop, we deliver field-tested blueprints, rigorous tool diagnostics, and precise cut-lists. From calculating shear strength for load-bearing mounts to diagnosing structural deficiencies, we provide the objective data required to execute professional-grade DIY projects safely and effectively.